Creating a Wordpress blog on Hostinger and linking it with your Vacation Labs website
Overview
- Before you begin - don’t skip this section
- Sign up for a Hostinger plan
- Adding a website on Hostinger
- Deleting the WordPress installation to create a new installation in the /blog directory
- Installation of WordPress in the /blog directory
- Configure the URL in the database
- Installing a Self-Signed SSL Certificate
- Accessing the blog and WP-admin without making the blog live
- Launching the Blog
Before you begin (don’t skip this section)
- If hosting your blog on a subdomain, i.e. blog.yourdomain.com, is acceptable to you then nothing in this, and related, support articles applies to you. Please host your blog using any blogging platform (Wordpress, Ghost, Blogger, etc) and configure it to use blog.yourdomain.com as its address. Go to your domain panel and create a DNS entries for blog.yourdomain.com as specified by your blogging platform. Finally, add a link to your blog in your website header/footer. While there is no dependency on Vacation Labs in this process, we would be glad to walk you through the process if you reach out to support@vacationlabs.com
- Only follow this, and related articles if you strongly prefer hosting your blog on a sub-directory, i.e. www.yourdomain.com/blog. Any blogging platform that allows a reverse-proxy setup will work with similar steps. The articles given below, provide the steps for one particular blogging platform (Wordpress on Hostinger), because we found it to be cost-effective and with reasonable support & up-time (not the best, but acceptable at the price). Again, any blogging platform should work with similar steps, but these articles providesdetailed steps for one of them, which we have tried & tested.
Sign up for a Hostinger plan
The first step is to purchase a WordPress hosting plan from Hostinger. You can find pricing details : https://www.hostinger.in/pricing
Hostinger offers plans on a monthly, yearly, two-year, or four-year basis, so you can choose the one that best fits your needs.
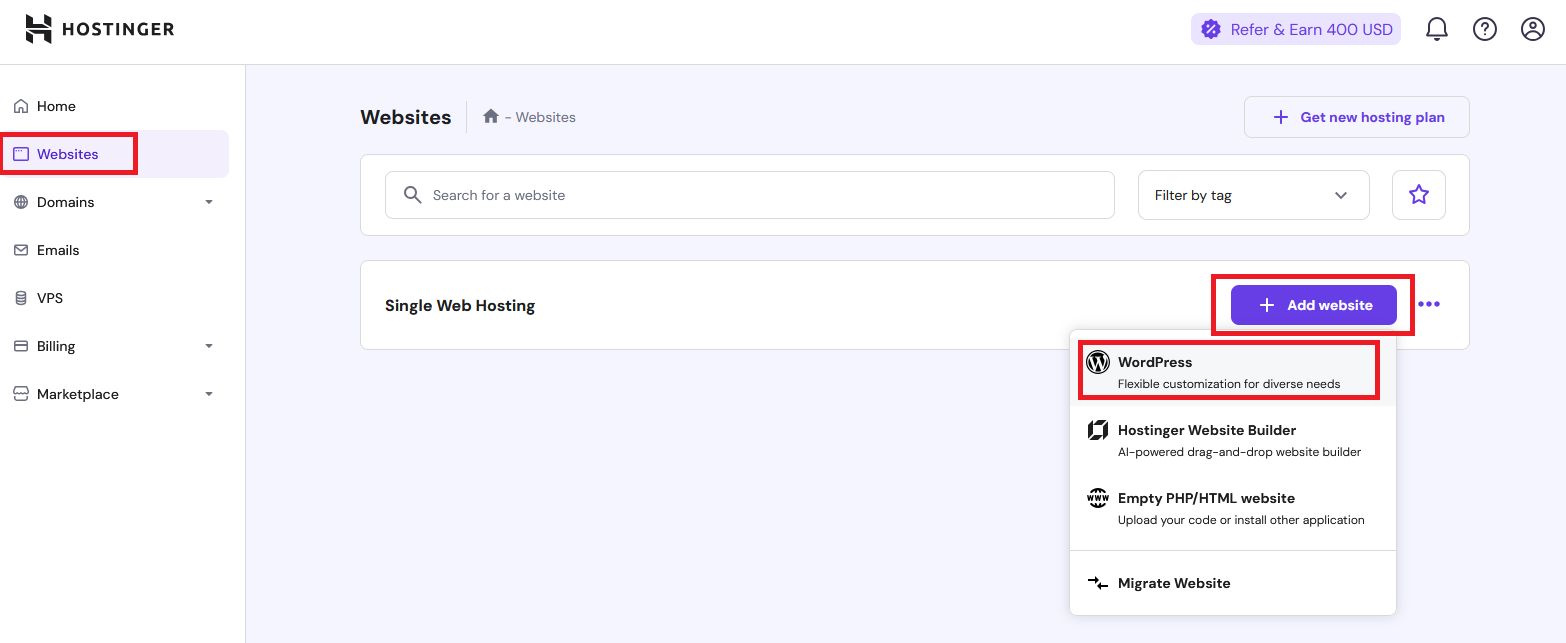
Adding a website on Hostinger
Navigate to Website, then click the Add Website button and select WordPress.
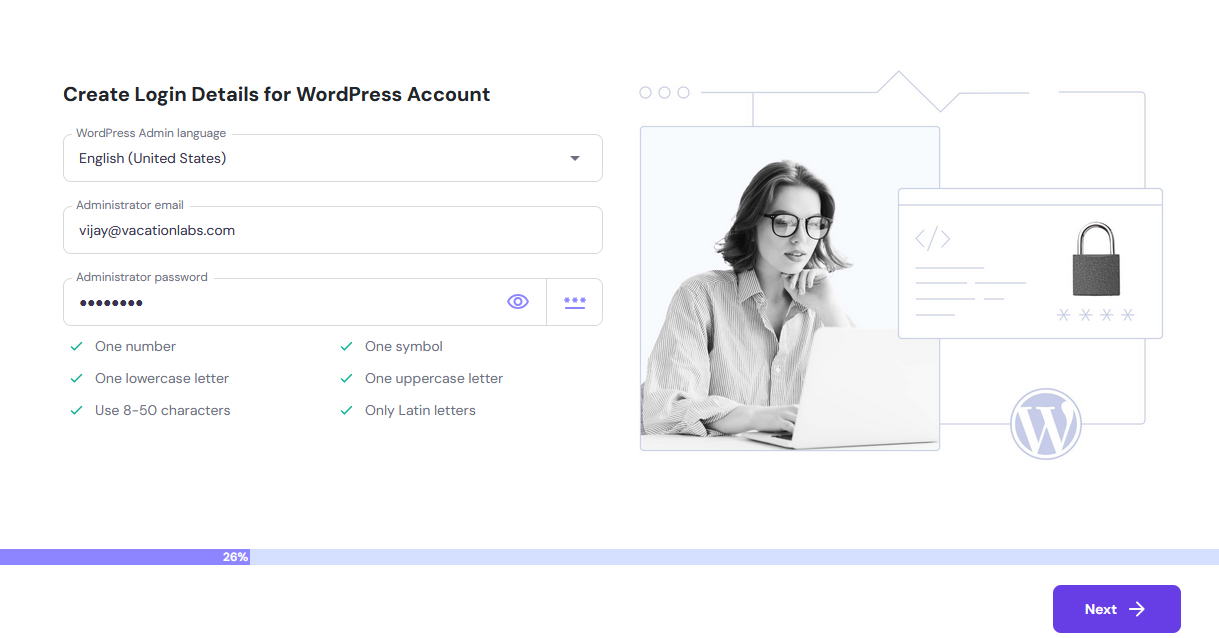
Next, create Login Details for WordPress Account and click on Next button.
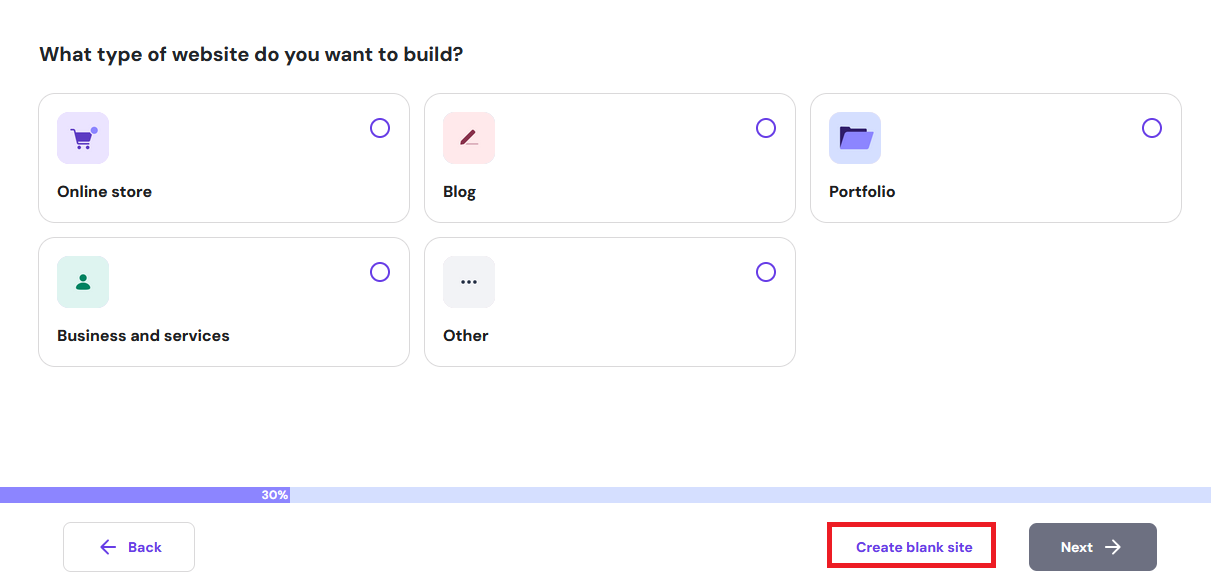
Select Create a Blank Site and click on the Next button.
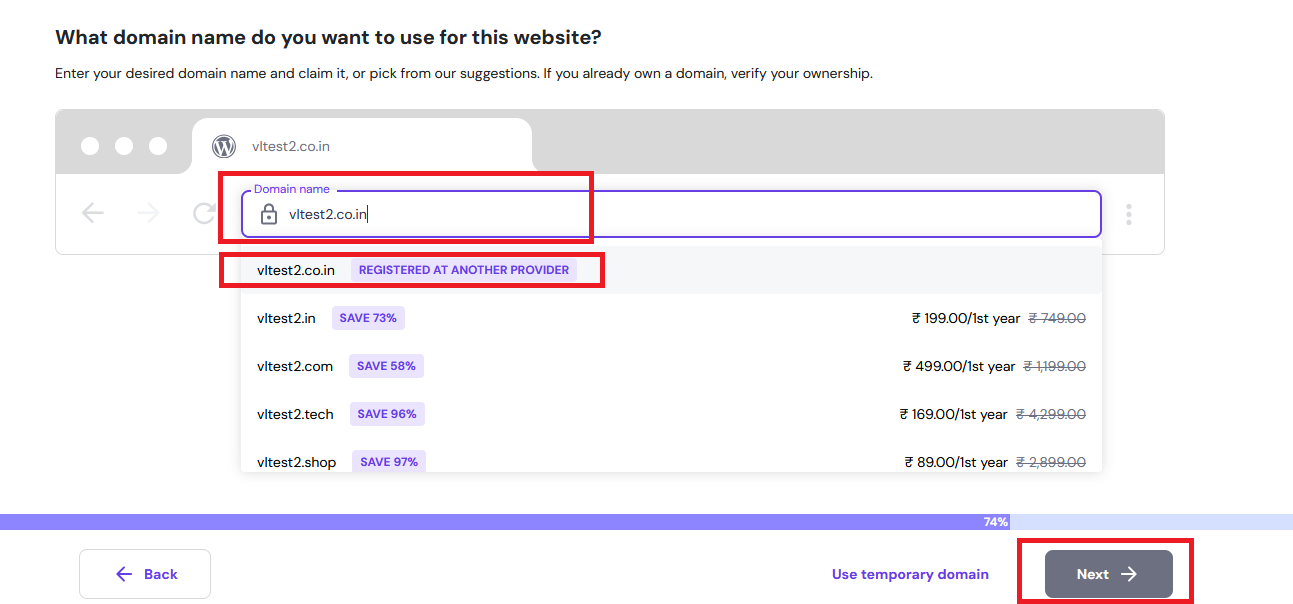
In the next step, add your domain hosted on VL (yourdomain.com) and click Next.
After clicking Next, WordPress will be installed on your domain. Please wait a moment for the installation to complete.
Deleting the WordPress installation to create a new installation in the /blog directory
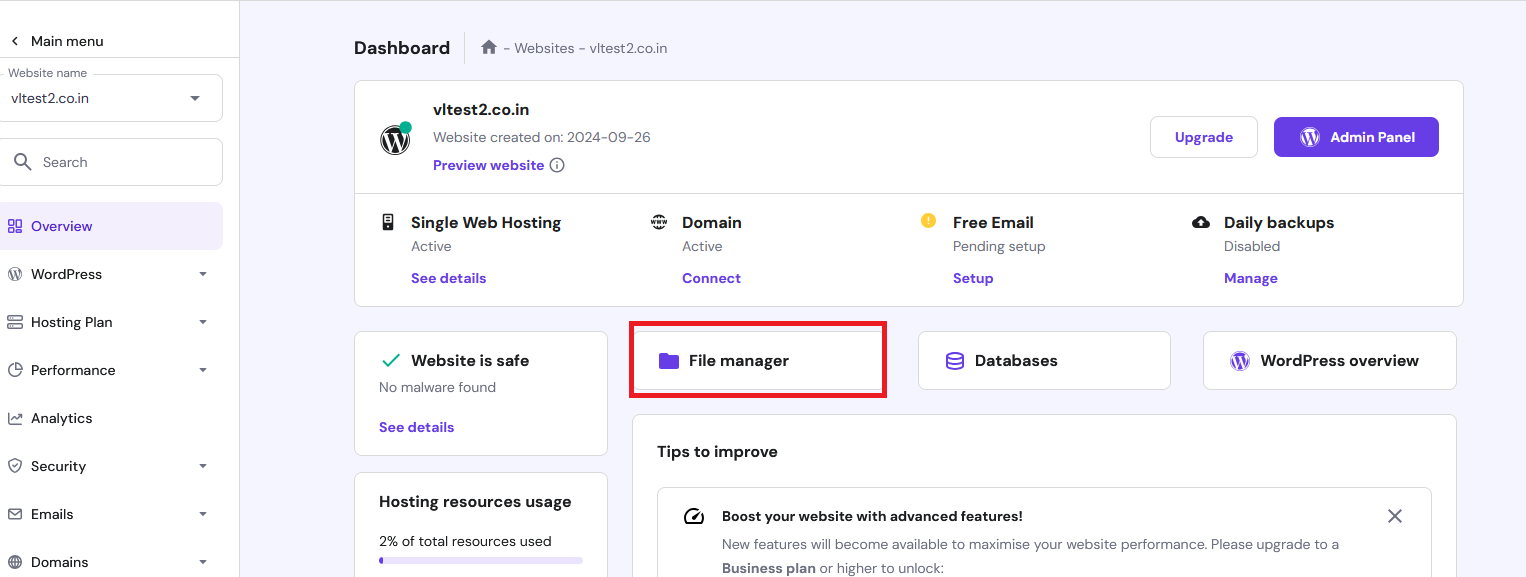
WordPress is now installed on your domain. To install it in the /blog directory, first manually delete the files that were installed during the previous process. To delete the files, click on File Manager.
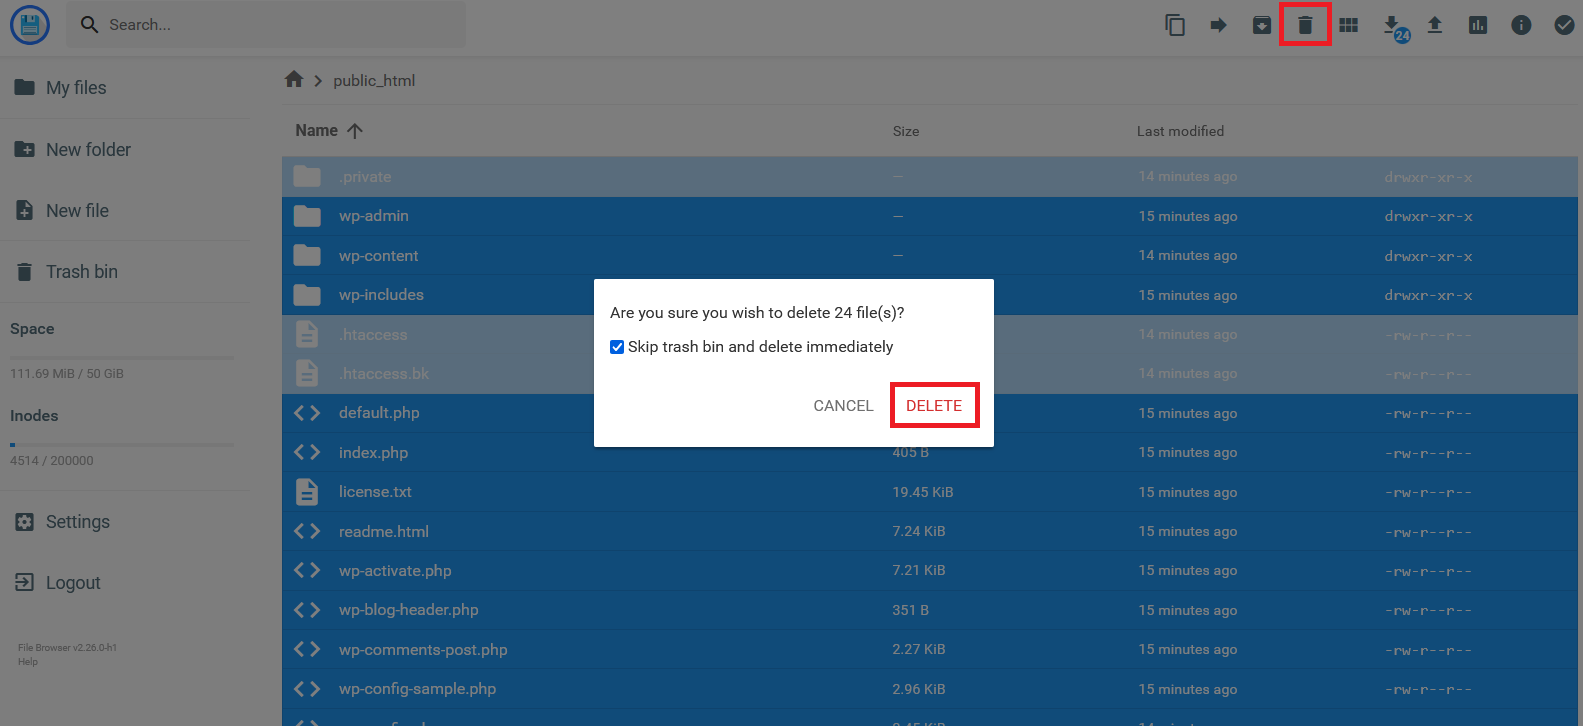
Open public_html folder

Select all files and click the delete button to remove them.
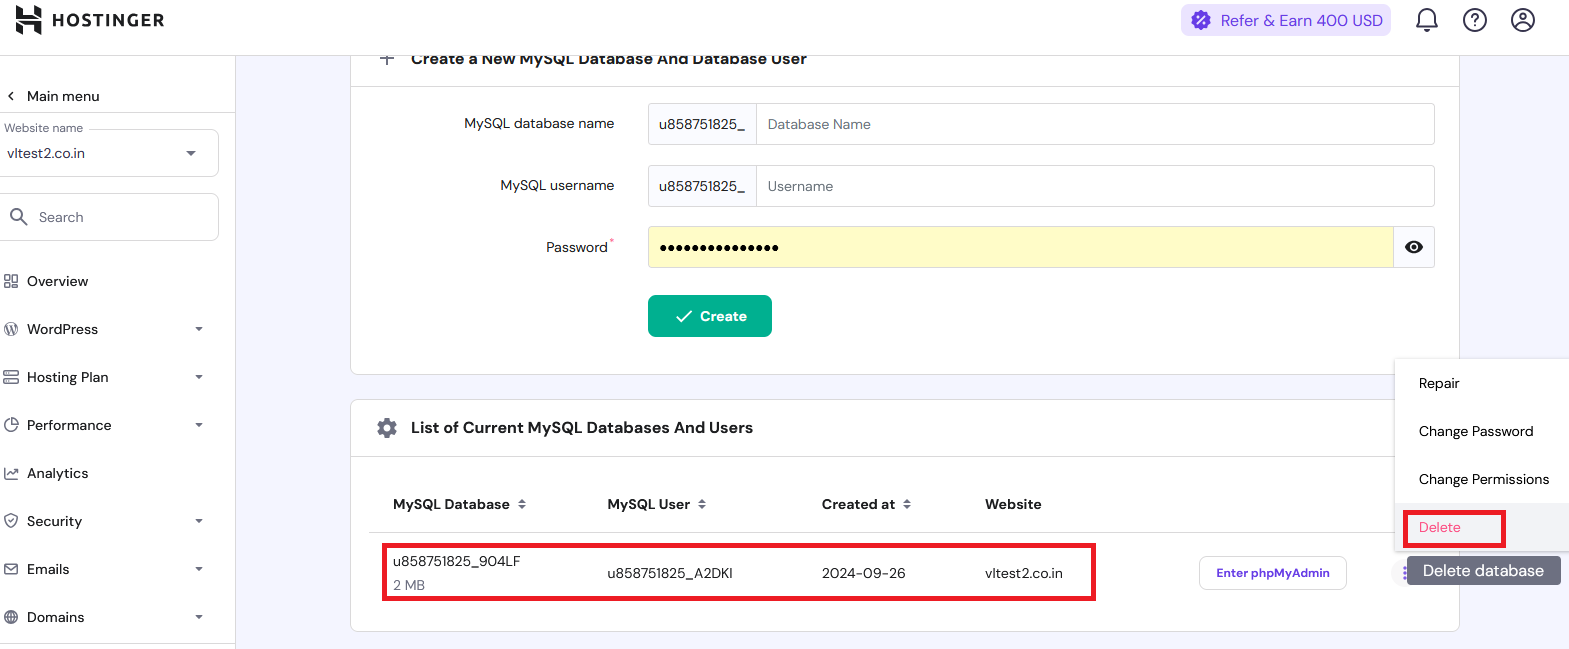
Navigate back to the dashboard, click on “Database,” and delete the previously created database.
Installation of WordPress in the /blog directory
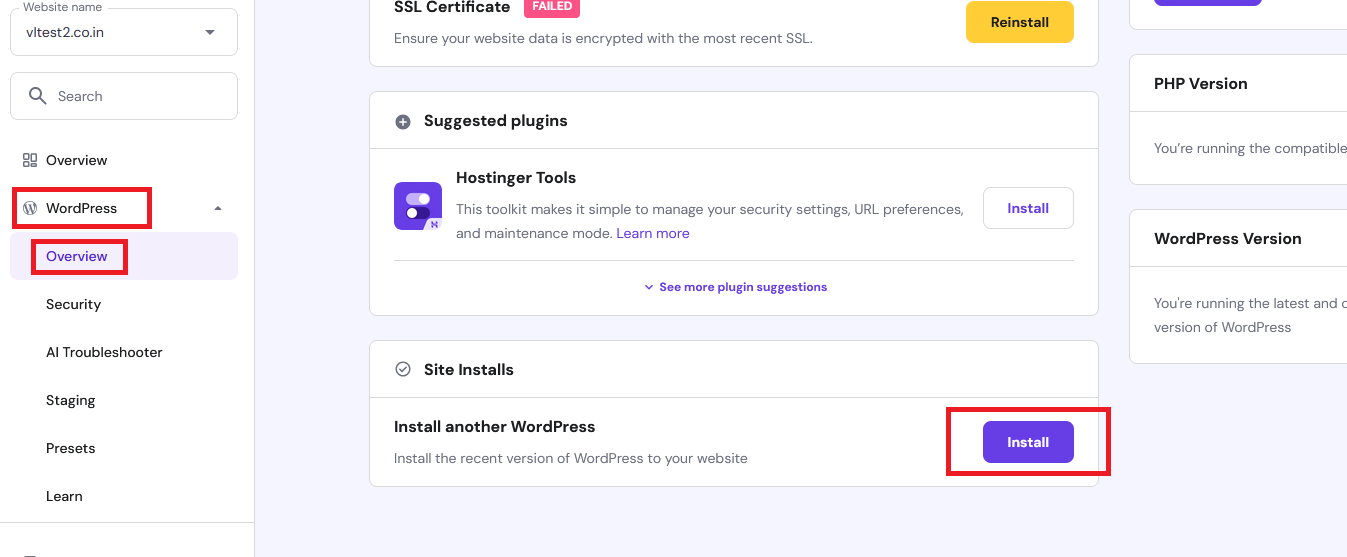
Open the dashboard and navigate to WordPress > Overview. Scroll down to the bottom, and you will find the option to “Install Another WordPress.” Click the install button.
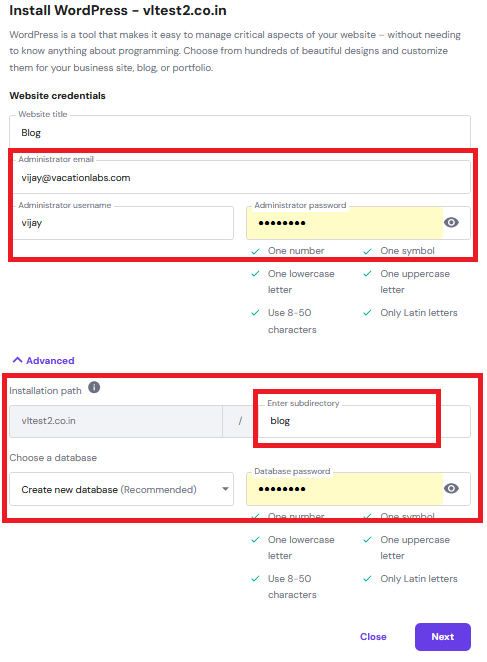
Next, create your admin username and password. Click on “Advanced,” specify the subdirectory as “blog,” and configure the database password and click on Next button.
Next, click on Install button.
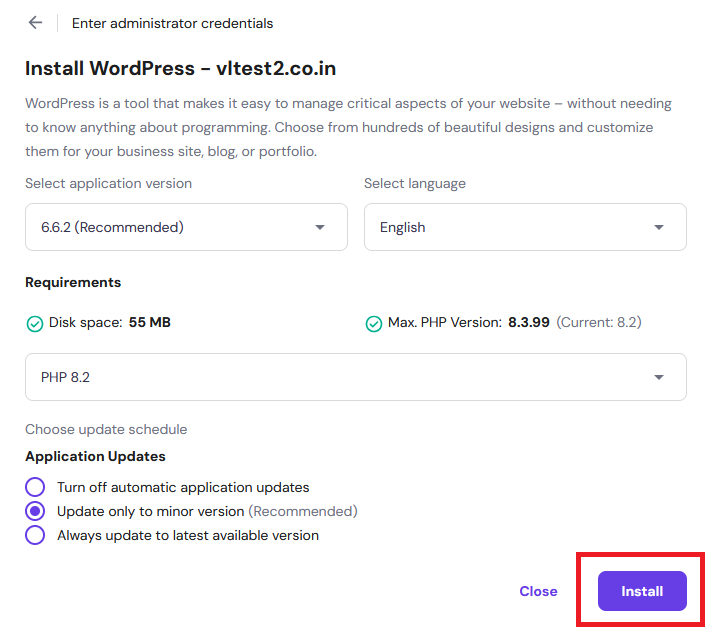
Now, WordPress is installed in the /blog subdirectory.
Configure the URL in the database
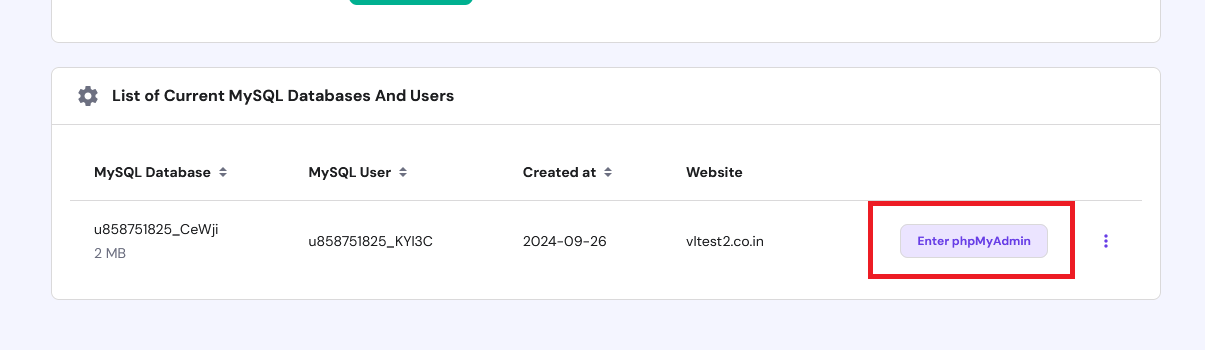
Go to the dashboard, click on “Databases,” locate the installed database, and click the “Enter phpMyAdmin” button.
In the database, select the wp_options table.
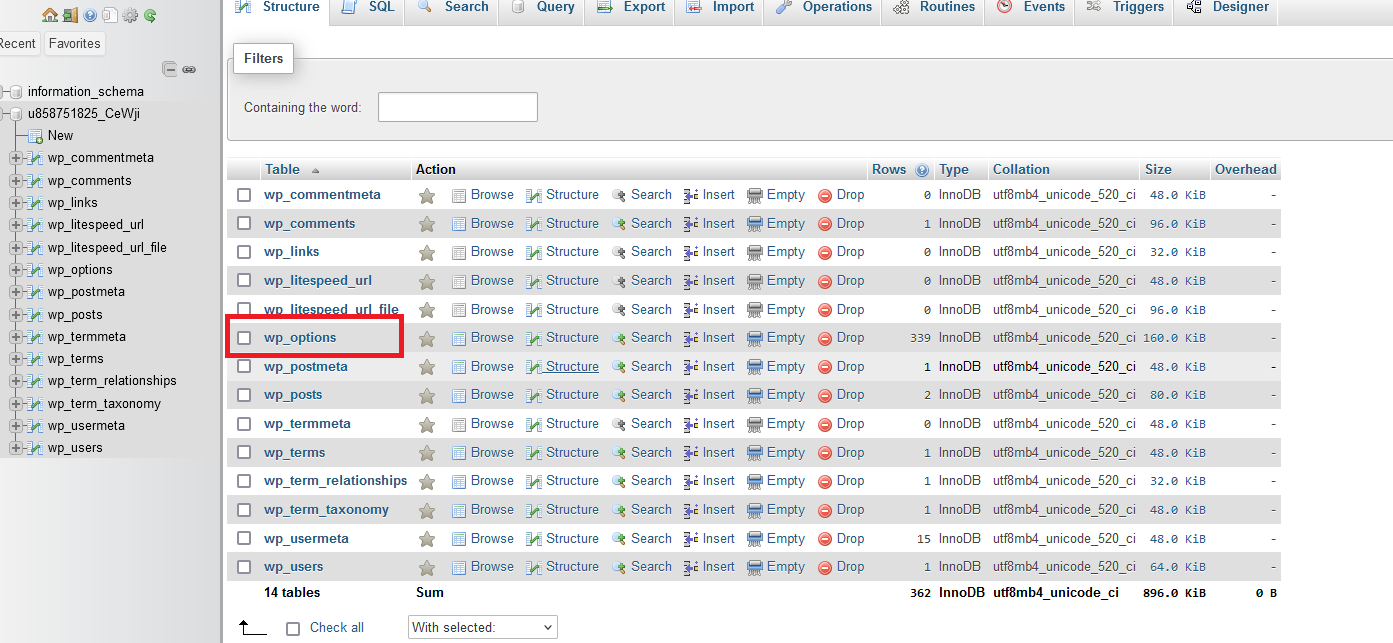
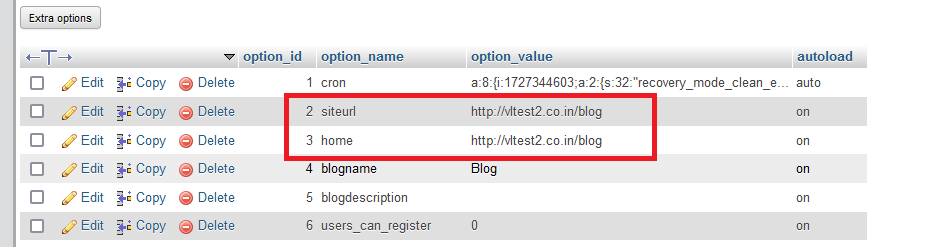
Here, update the siteurl and home values to https://www.yourdomain.com/blog (for this example, I updated the URL to https://www.vltest2.co.in/blog)

Installing a Self-Signed SSL Certificate
To generate a self-signed SSL certificate, please refer to this support article: https://help.vacationlabs.com/portal/en/kb/articles/creating-a-self-signed-certificate
To install a self-signed SSL certificate, please follow the steps outlined in this support article:https://help.vacationlabs.com/portal/en/kb/articles/migrating-from-another-wp-host-to-hostinger#Creating_a_Self-Signed_SSL_Certificate_for_HTTPS_on_the_blog
Accessing the blog and WP-admin without making the blog live
To access the blog and WP admin without making the blog live, please follow the steps outlined in this support article: https://help.vacationlabs.com/portal/en/kb/articles/blog-admin-website-cdn#Configure_host_entries_using_the_PowerToys_tool
Launching the Blog
Once you feel the blog is ready to go live, then, please share the IP address and domain with the Vacation Labs support team (please raise a ticket by sending an email to support@vacationlabs.com). This will allow us to set up the reverse proxy and make your blog live.