Creating Custom Search Filters
Overview
-
Create a Custom Field
-
Assign Filter Options to Tours
-
Enable the Filter on Your Website
Create a Custom Field
To create custom search filters, we first need to create a custom field containing the different search options. Next, we’ll tag the tours with the relevant filters, and finally, display the new custom search filter on your search page. Once this is done, your search page will have a fully functional custom search filter.
To create a custom field, go to Settings and open Trip Custom Form, then Add new field.
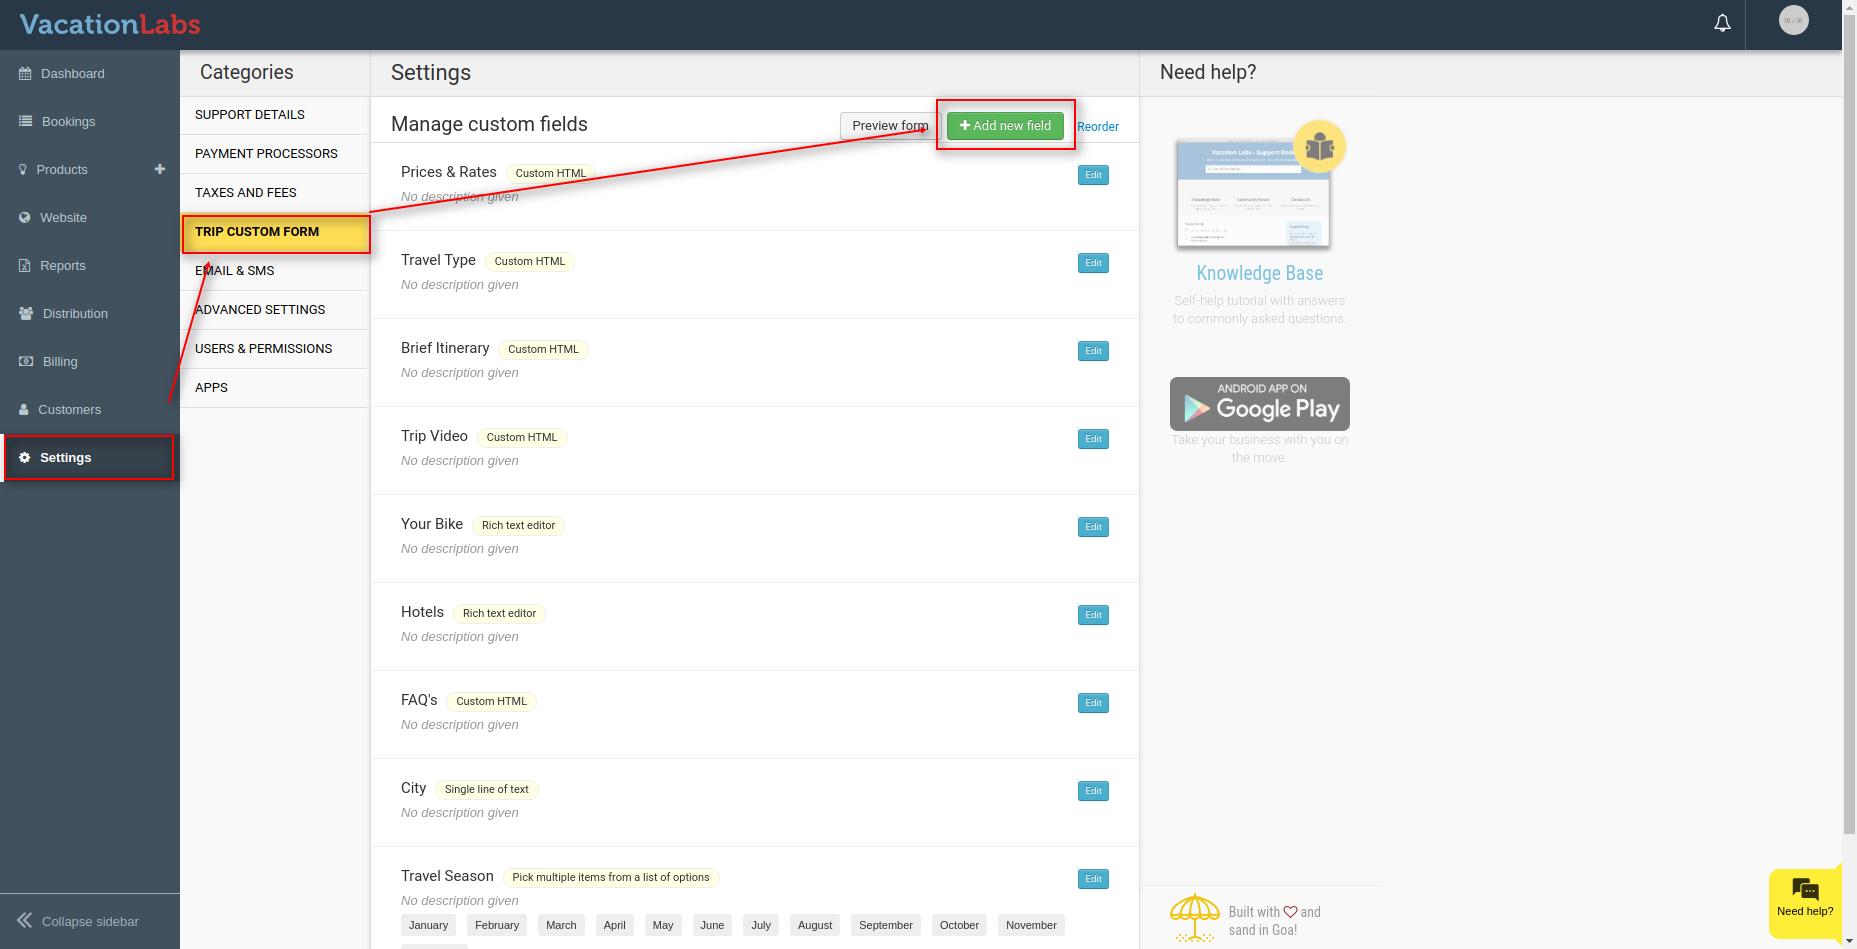
Set the field type to Pick Option from List so a tour can be tagged with multiple options. Enter all the filter options in the Options field, pressing Enter after each one, and select the desired option under Display as. When finished, click Done.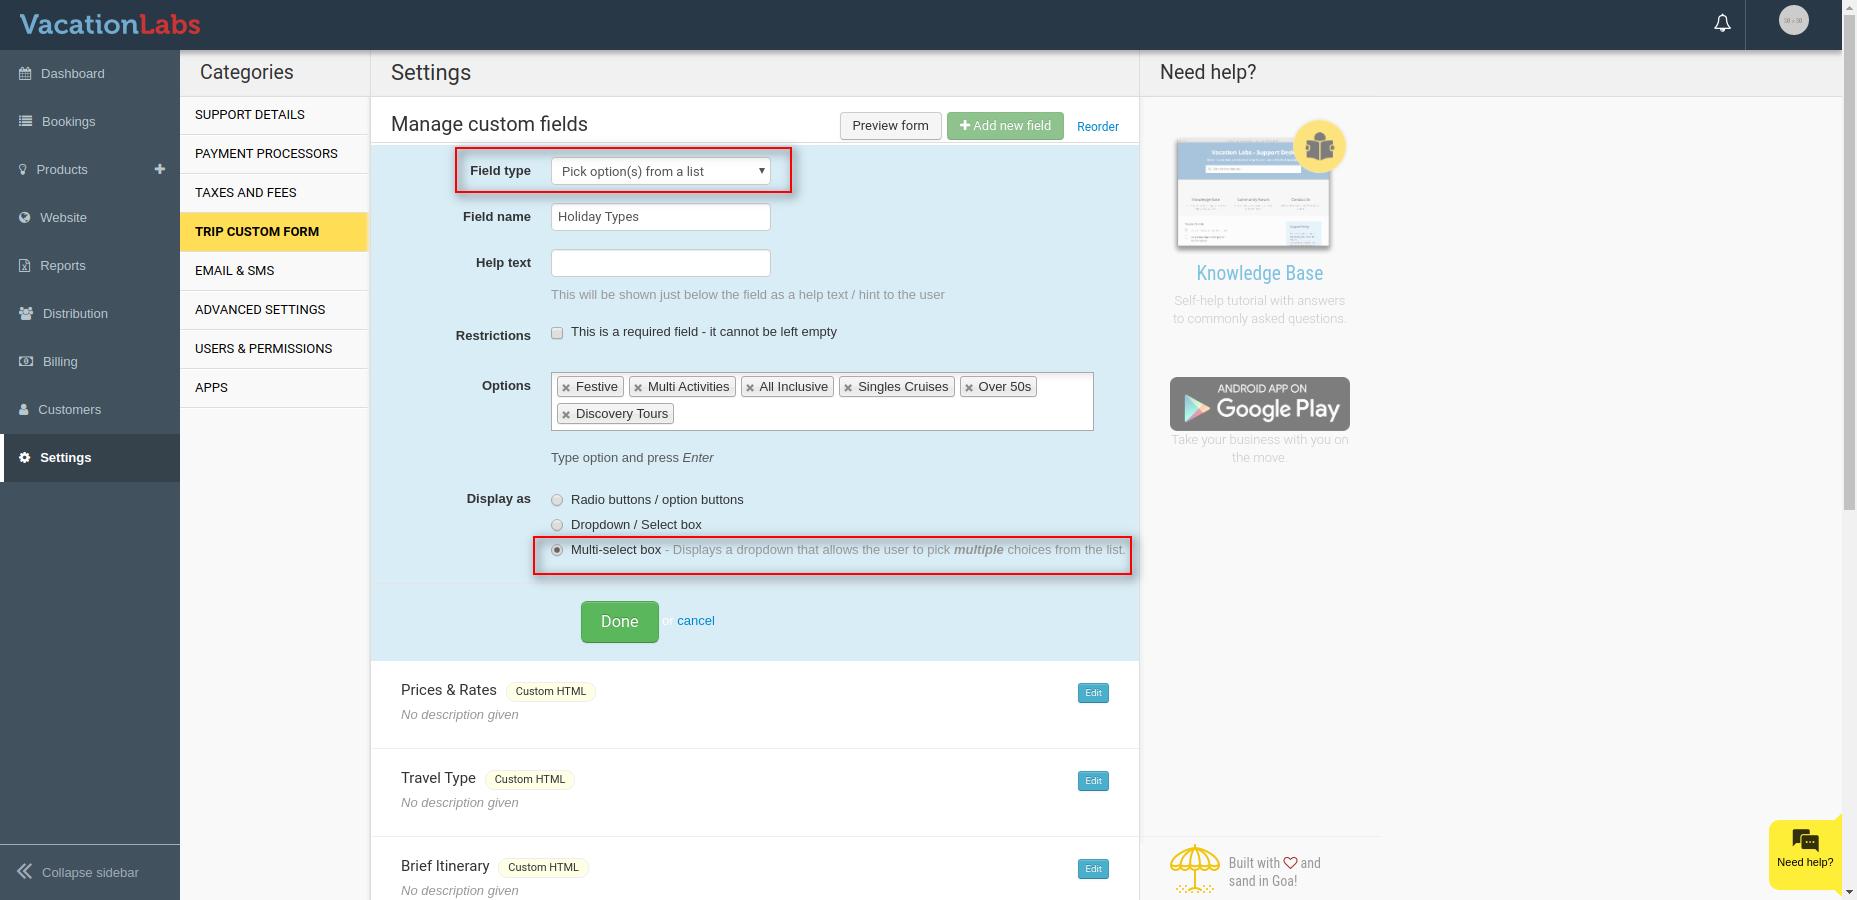
Assign Filter Options to Tours
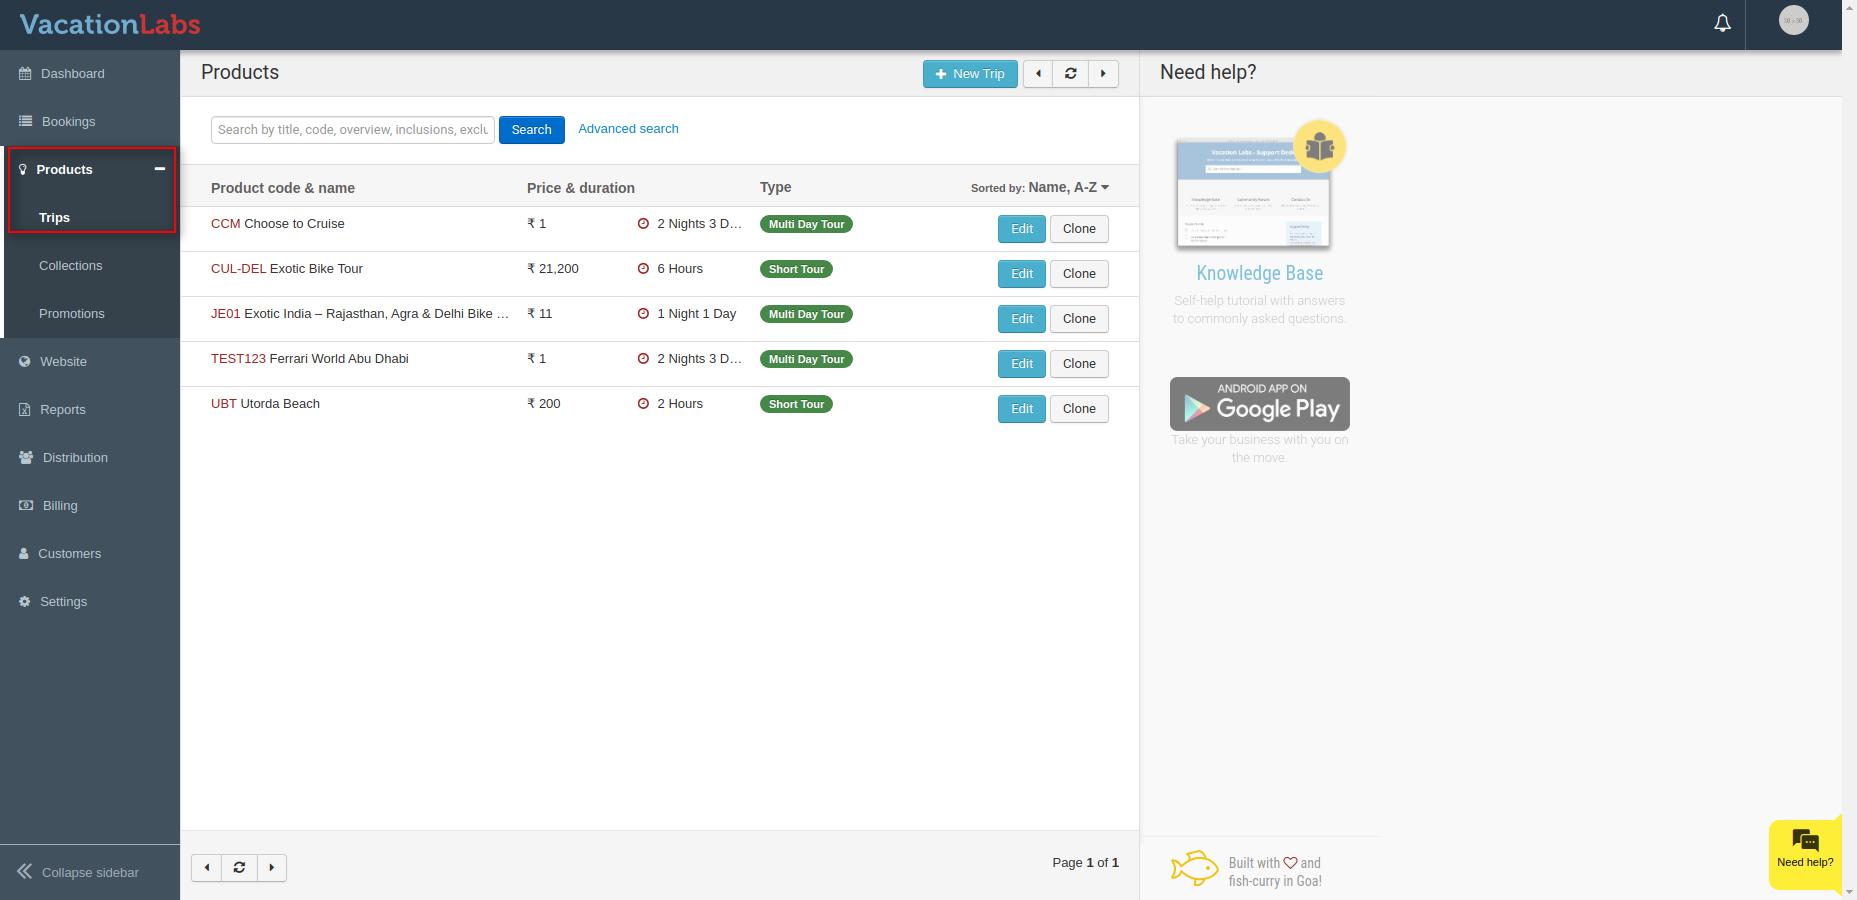
Go to Products > Trips and edit the trip you want to update.
Go to Basic Details and scroll down to find the custom field you created earlier. Select all applicable options from the dropdown for that tour, save your changes, and repeat the process for each tour so they are all assigned the correct filter options.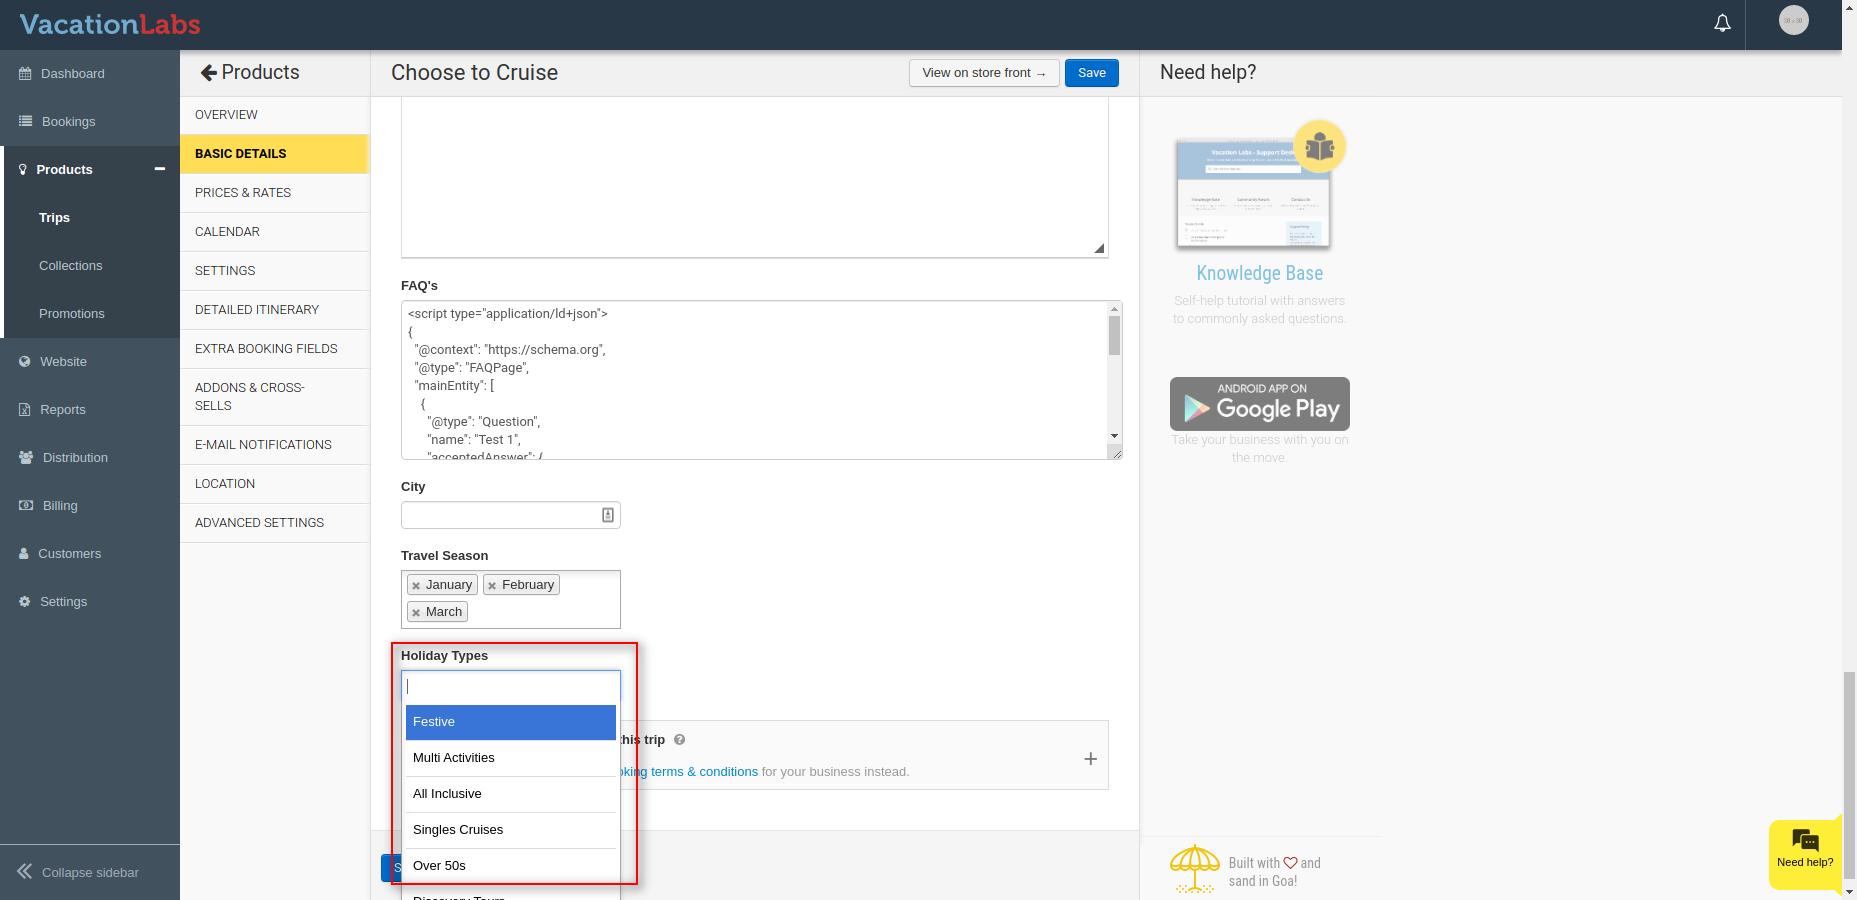
Info
Repeat these steps for every tour so that each is tagged with the correct filter options.
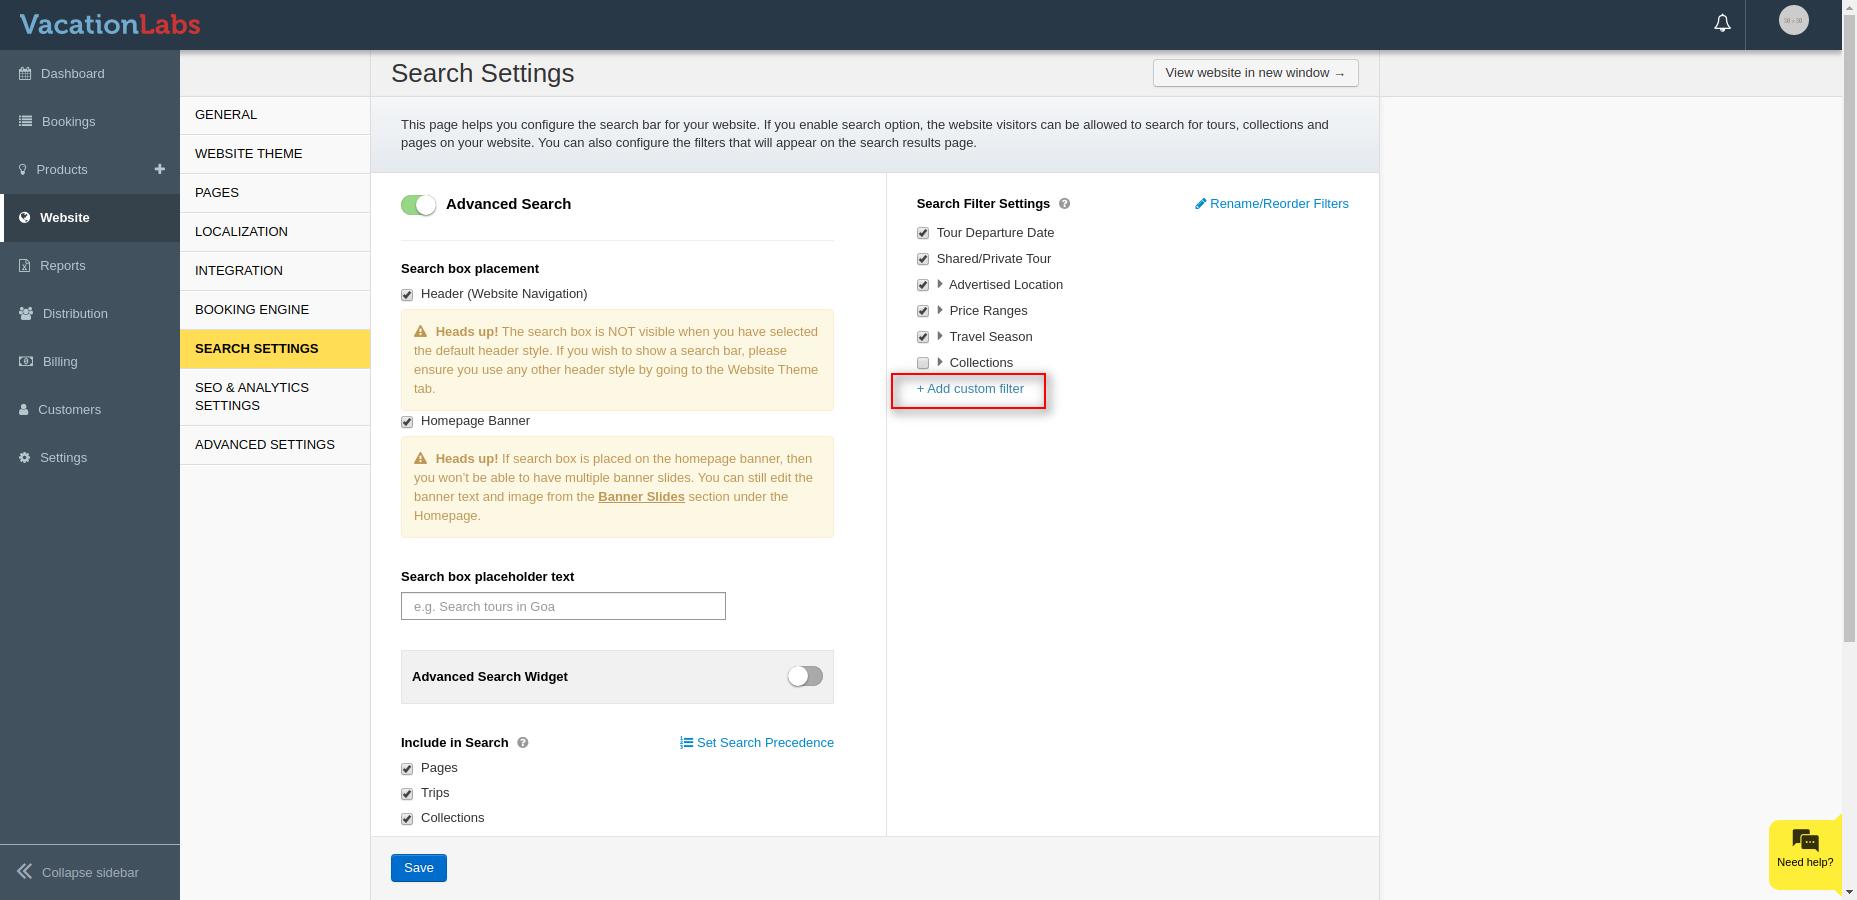
Enable the Filter on Your Website
To enable the filter on your website, go to the Website tab and open Search Settings. Click Add Custom Filter on the right side.
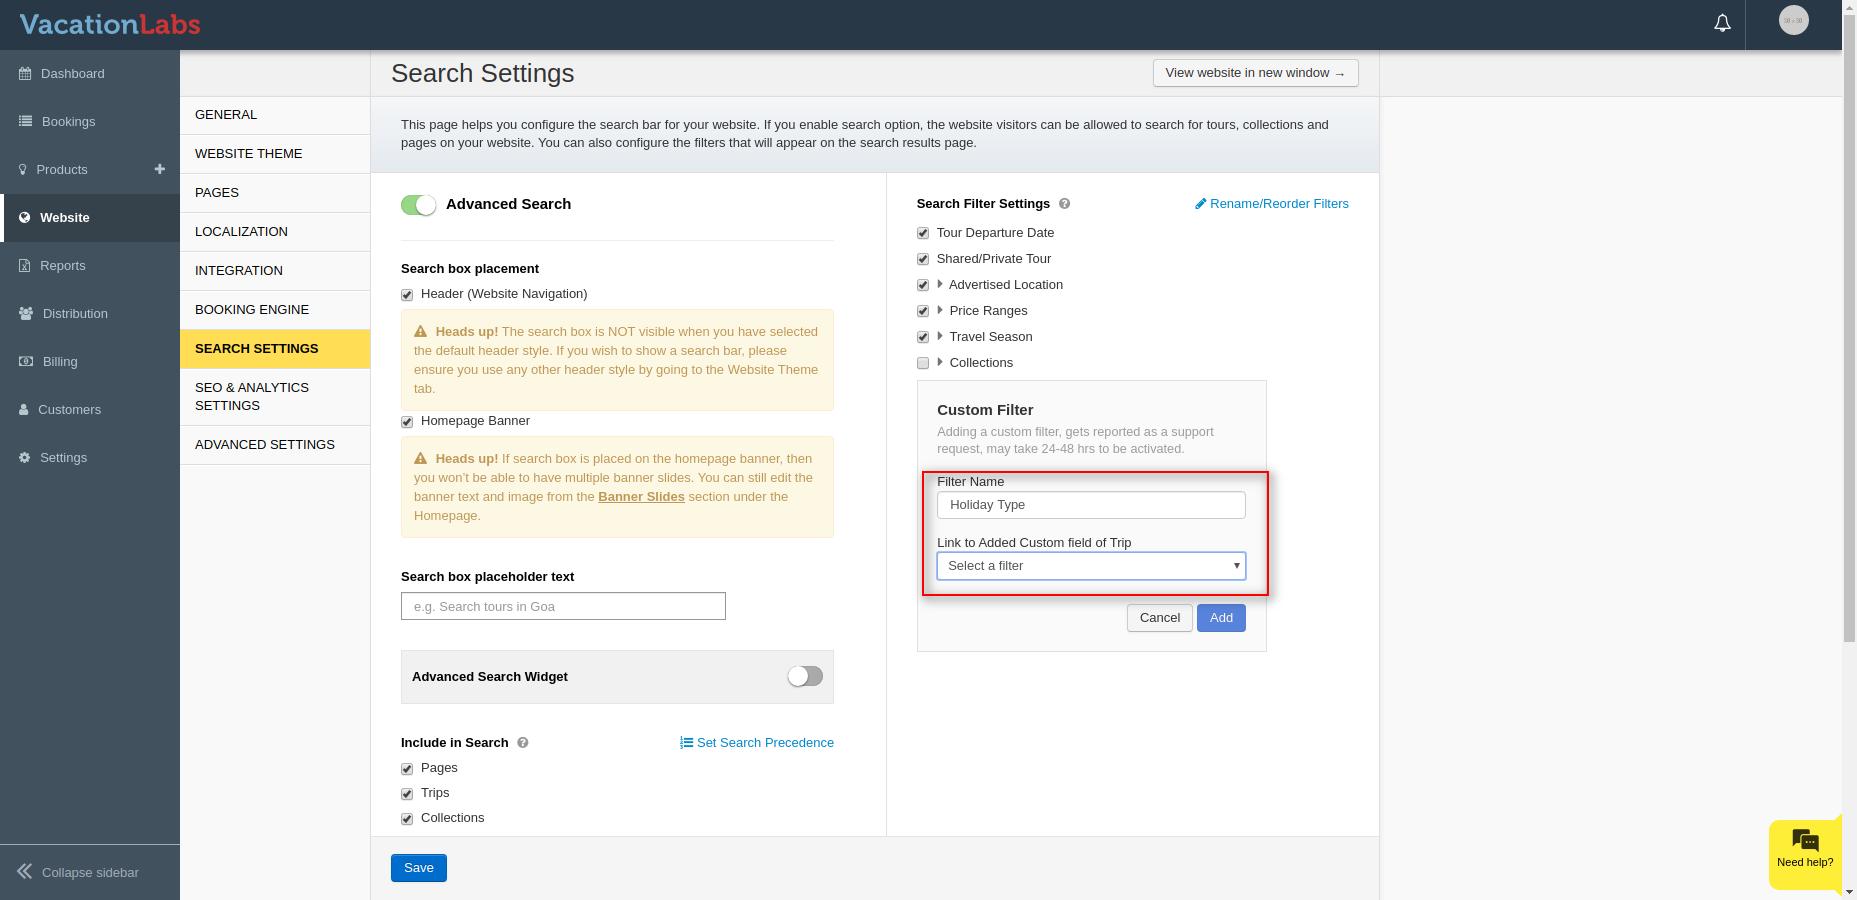
Enter a name for your filter (for example, Holiday Types or Destinations), and in the Link to Added Custom Field of Trip dropdown, select the filter you created earlier. Once done, click Add and then Save.
Once complete, your custom filter will be visible on your search page. You can check it by visiting: https://yourdomain.com/en/search?&cache=false (Replace yourdomain.com with your actual domain)