How to add users or team members to your account?
Your Vacation Labs subscription plan allows you to give your team access to the Admin Panel. Each team member can be added as a User, and you can control exactly what parts of the system they can view or manage.
Follow the steps below to add a new user:
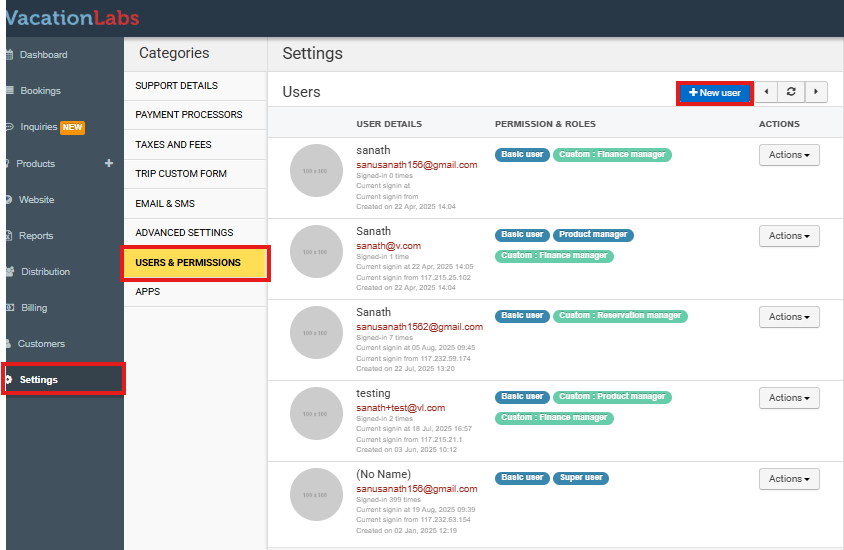
Step 1: Go to User Settings
-
Log in to your Vacation Labs Admin Panel.
-
From the left-hand menu, go to Settings.
-
Select Users & Permissions.
-
Click the New User button to begin adding a new team member.
Step 2: Enter User Details
When creating a new user, you will need to provide the following details:
-
Name of the team member – This will appear on their profile.
-
Email address – This will act as the username for logging in.
-
Password – Set an initial password. The user can change it after logging in.
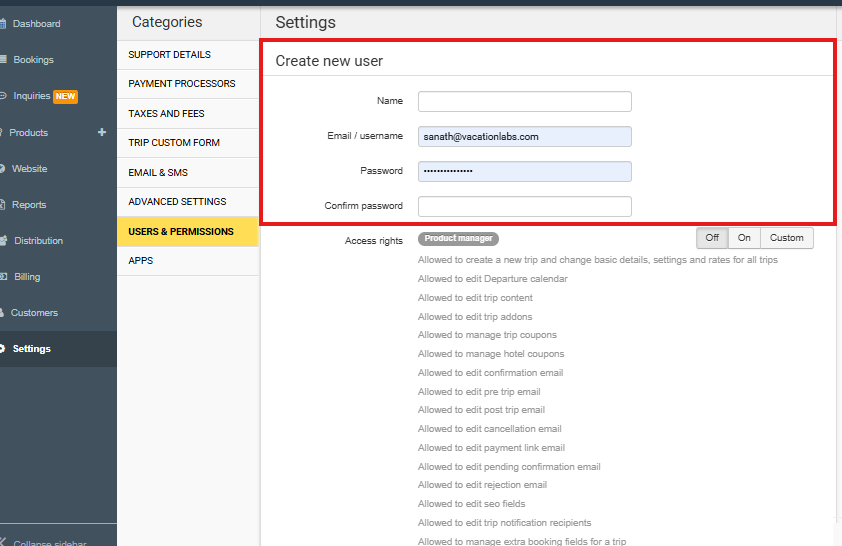
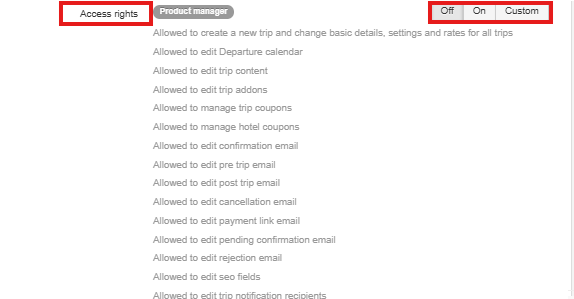
Step 3: Assign Access Rights
Access Rights determine what each user can do inside the Admin Panel.
-
You can choose from pre-set designations such as:
-
Product Manager – Can manage trips, products, pricing, and related settings.
-
Content Manager – Can manage website content, collections, and static pages.
-
Reservations Staff – Can handle bookings, inquiries, and reservation reports.
-
Reservations Manager – Can manage all aspects of bookings, payments, and reports.
-
Finance Manager – Can handle payments, refunds, and financial reports.
-
Super User – Has complete access to all system settings and controls.
-
Event Crew – Can manage check-ins, check-outs, and on-ground booking activities.
-
Supplier – Can manage trips, booking capacity, and supplier-related reports.
-
Marketplace Supplier – Can manage trips, bookings, payments, and content for marketplace operations.
-
-
Alternatively, select Custom to manually define which specific tasks the user can access.
Note
Note: A user will be able to see all sections of the Admin Panel, but they can only control or modify the areas they have permissions for.
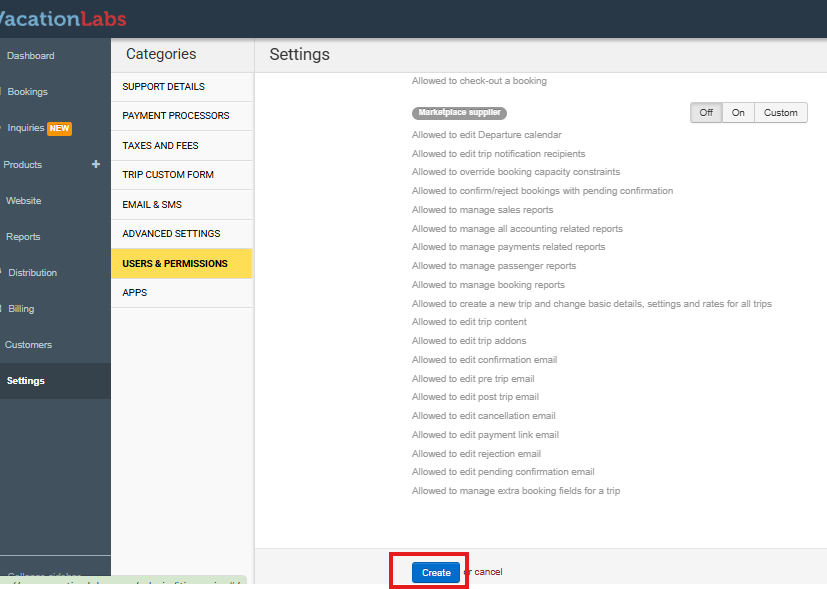
Step 4: Save
Once you’ve entered the user details and assigned their access rights:
-
Scroll down to the bottom of the page.
-
Click Create.
-
The new user will now appear in your Users & Permissions list.
-
Share their login details (email and password) with them so they can access their account.
That’s it! You’ve successfully added a new team member. They can now log in using their email address and password, and will only have access to the sections you’ve allowed.