How to create Custom HTML sections for Trip Pages?
Overview
- Adding a Custom HTML section
- Enable the “Show as Full Section” option for the field
Adding a Custom HTML Section
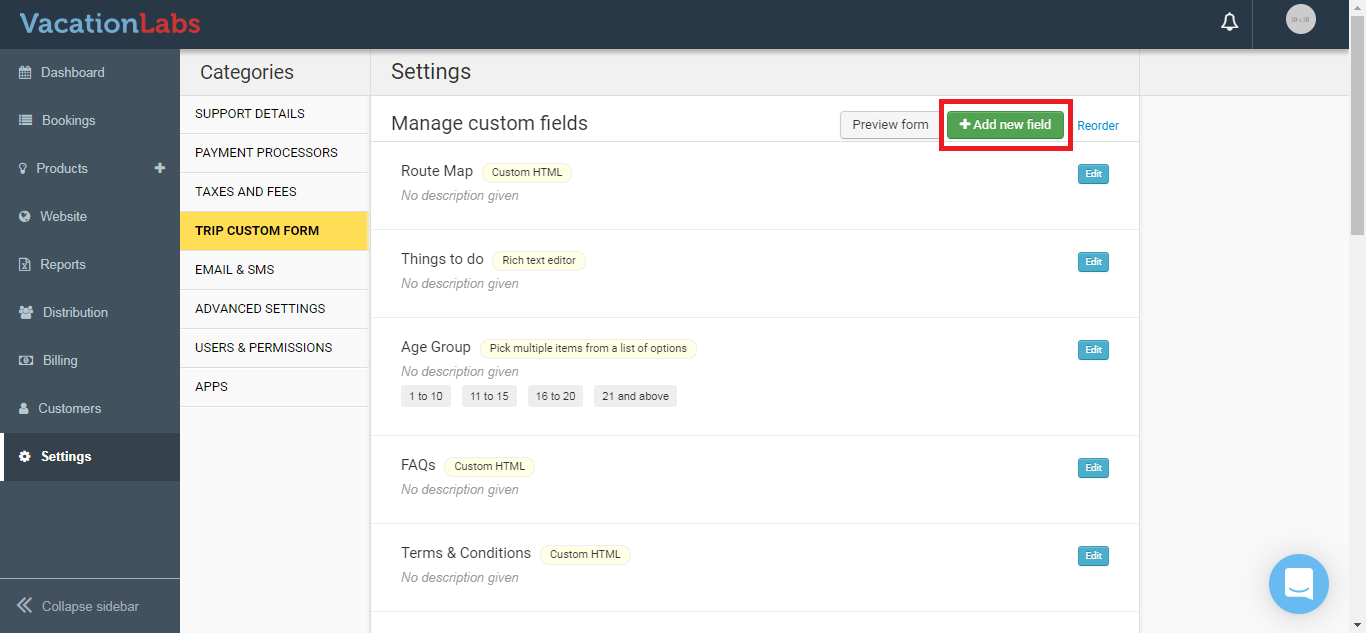
To add a Custom HTML section, go to Settings > Trip Custom Form, then click on **Add New Field **
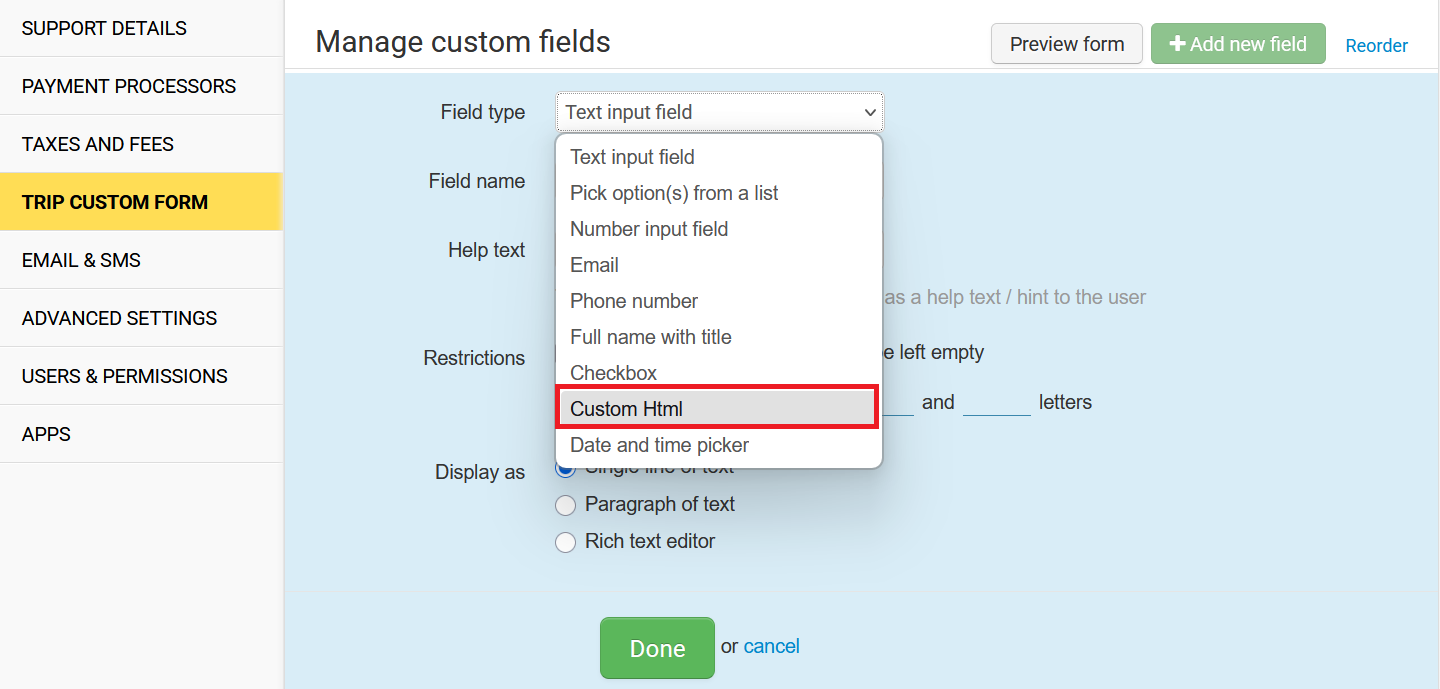
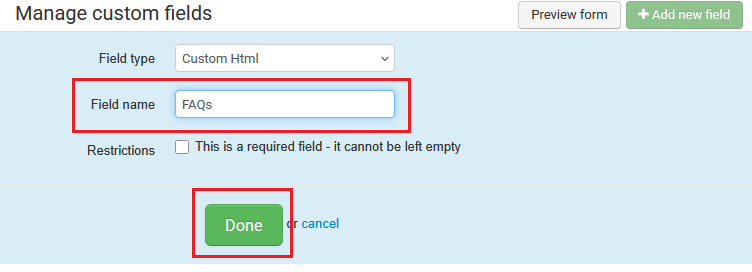
After that, choose Field Type as Custom HTML. Provide a Field Name that you’d like to use as the section title, then click Done.
Enable the “Show as Full Section” option for the field
After adding the Custom HTML field, go to Website > Pages > Tour Details Page. Under Page Sections, you’ll find the newly created Custom HTML field.
Click on it, enable the Show as Full Section option, and save the changes.
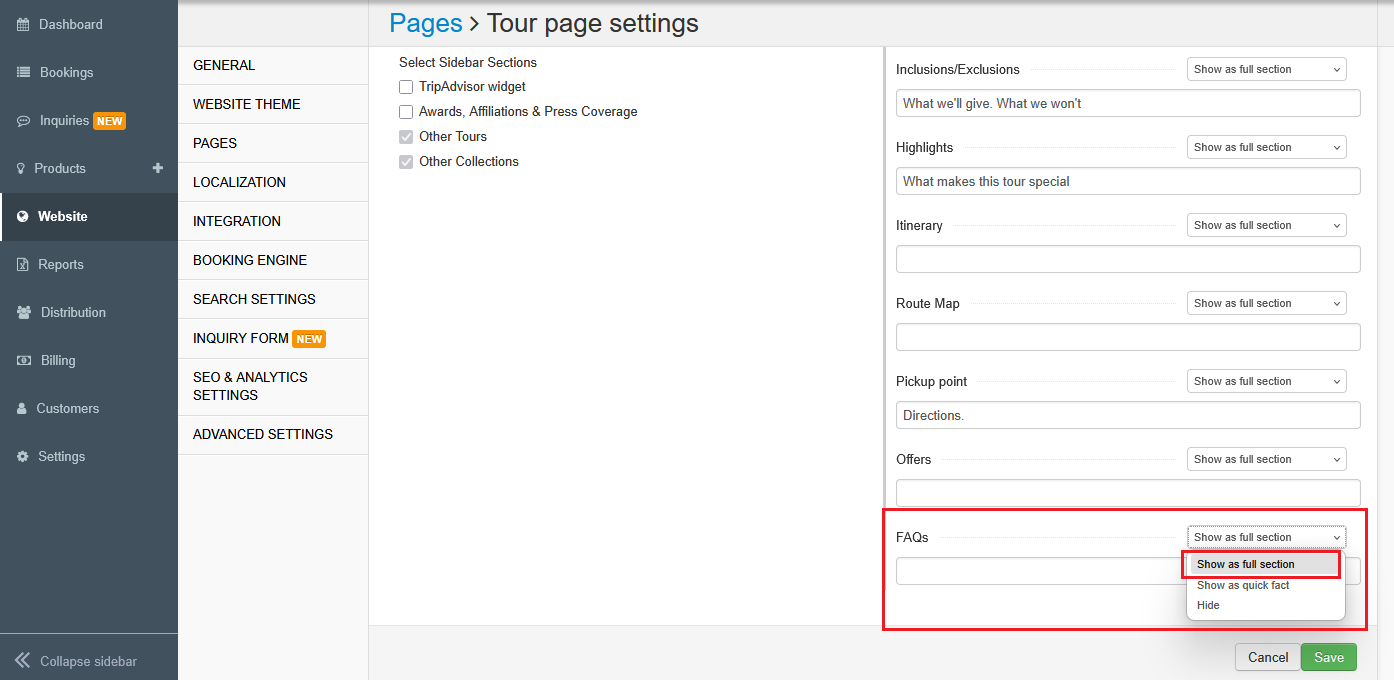
Once saved, navigate to Products > Trips > Edit Trip > Basic Details, where you’ll find the newly added field. You can use this field to embed custom HTML scripts, third-party widgets, or any other HTML content.
Tip
Please Note: You can follow the same steps to add other types of fields to the tour page. While adding a new field, simply select a different field type from the dropdown based on your requirement.