Integrating VacationLabs with CRM via Zapier
Overview
-
Setting up your accounts
-
Connecting Vacation Labs as a trigger in Zapier
-
Connecting CRM as a Action in Zapier
-
Testing and Verification
Setting Up Your Accounts:
Before you start ensure you have accounts for VacationLabs, Zoho CRM, and Zapier. If you haven’t already, create accounts and familiarize yourself with each platform’s interface.
Connecting Vacation Labs as a trigger in Zapier
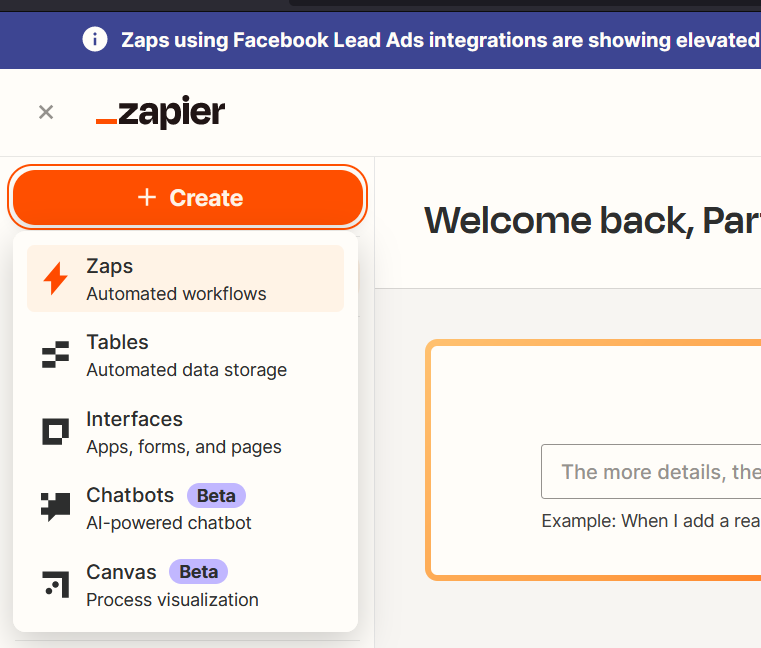
- Go to the Zapier website and log in to your account.
- Click on Create and then on Zaps (refer screenshot below)
- Click on Trigger (refer screenshot below)

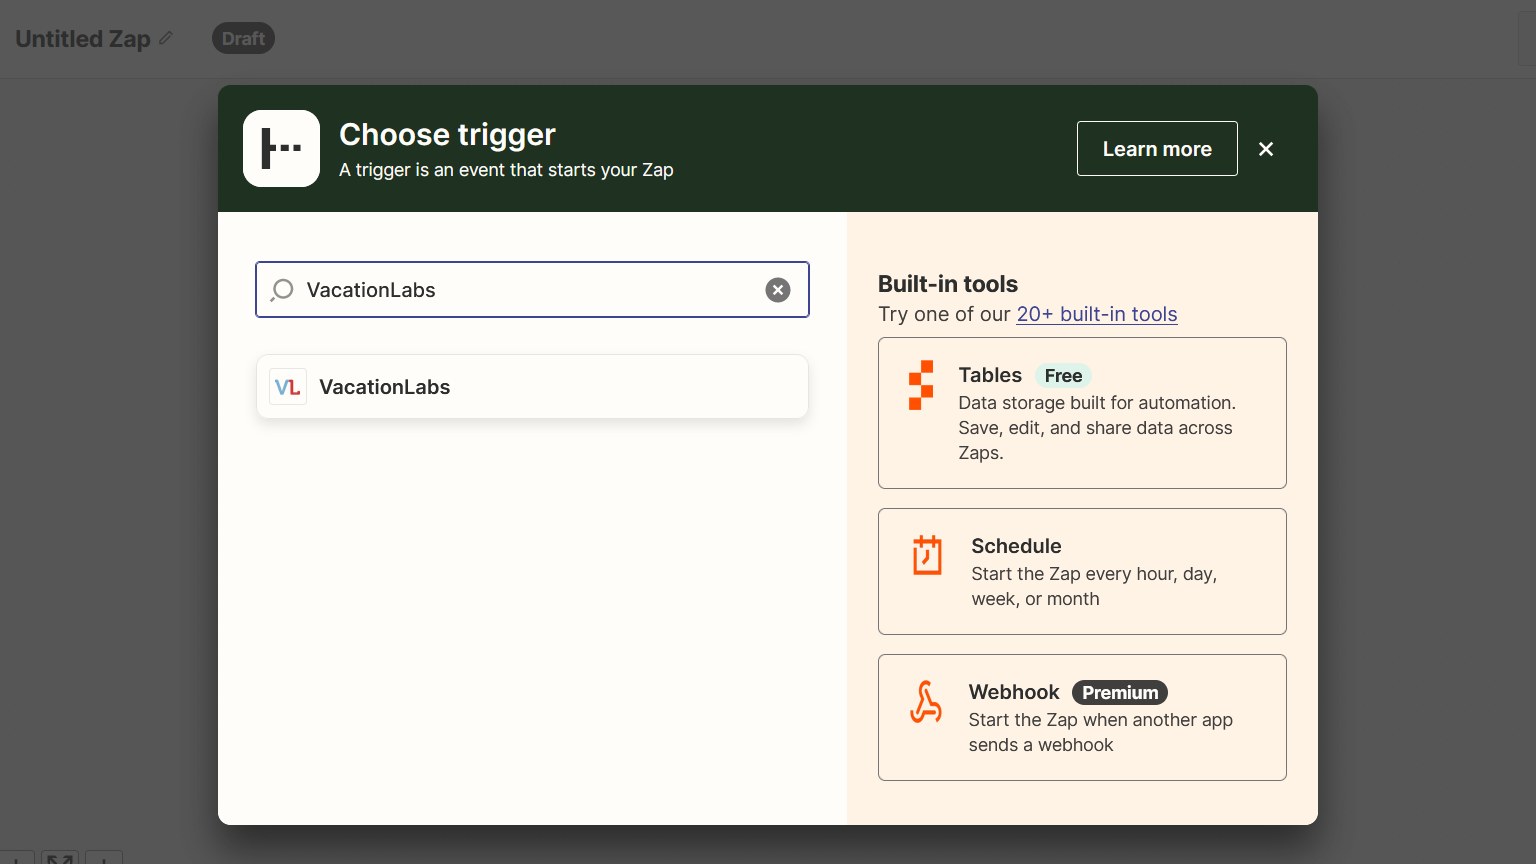
- In the box that appears search for VacationLabs and click on it (refer screenshot below)
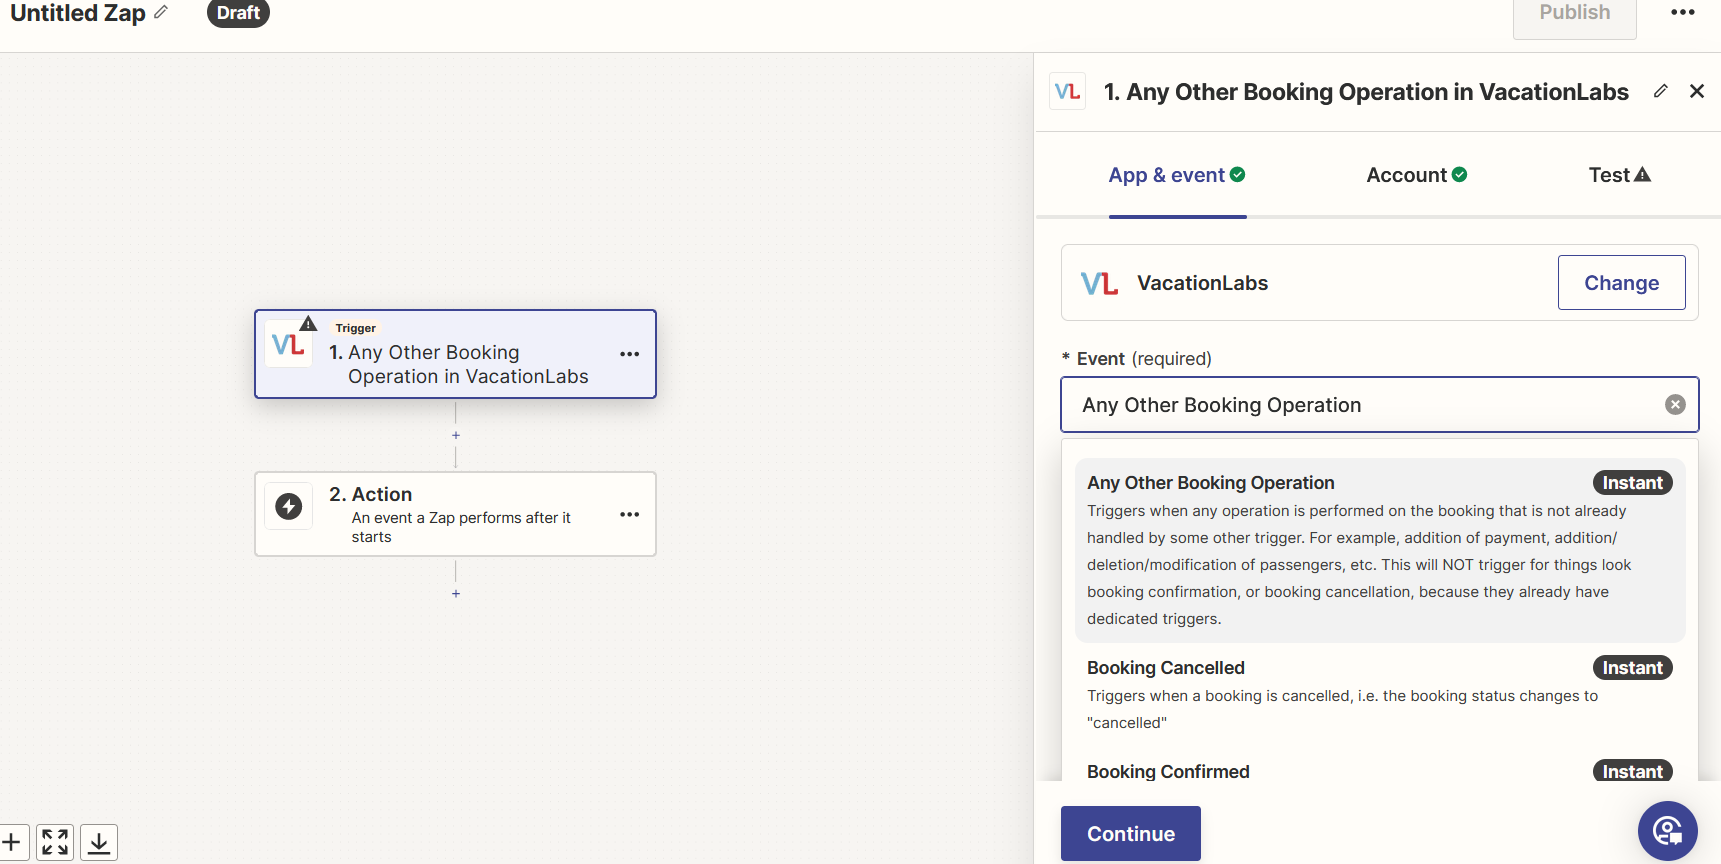
- Click on the box below Event and a dropdown will appear, from this dropdown you can select the Event that will act as the trigger (i.e, the workflow will get triggered when this event happens in VL). You can choose from options such as New Booking, New Inquiry, Booking Confirmed etc. (refer screenshot below) For this example we are picking New Booking as the trigger
- Click on Continue once you have selected the Event
- On the next page you will need to connect your VacationLabs account and then click on continue. Please CLICK HERE to read about this in detail
- Then on the Test page, zapier itself will test the event and VL Account by importing the data (bookings in this scenario) from your VL Account, if the data imported is correct then click on Continue with selected record
This Concludes the Trigger (Vacation Labs) part of the workflow
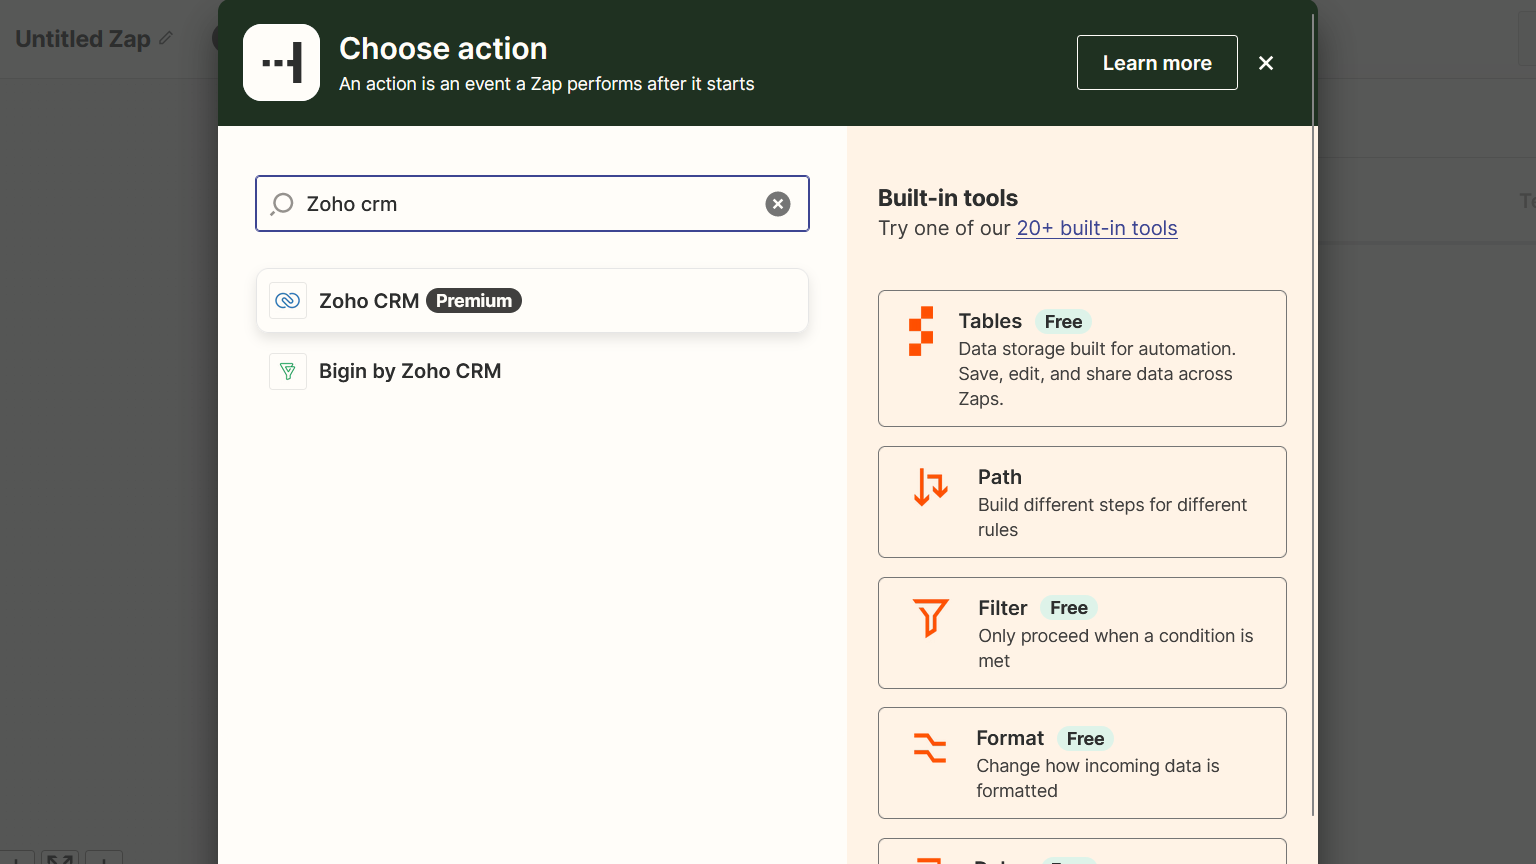
Connecting CRM as Action in Zapier (Taking Zoho CRM as an example in this instance)
-
In the Choose Action box that appears search for Zoho CRM (or any CRM which you want and is available on zapier)and click on it (refer screenshot below)
-
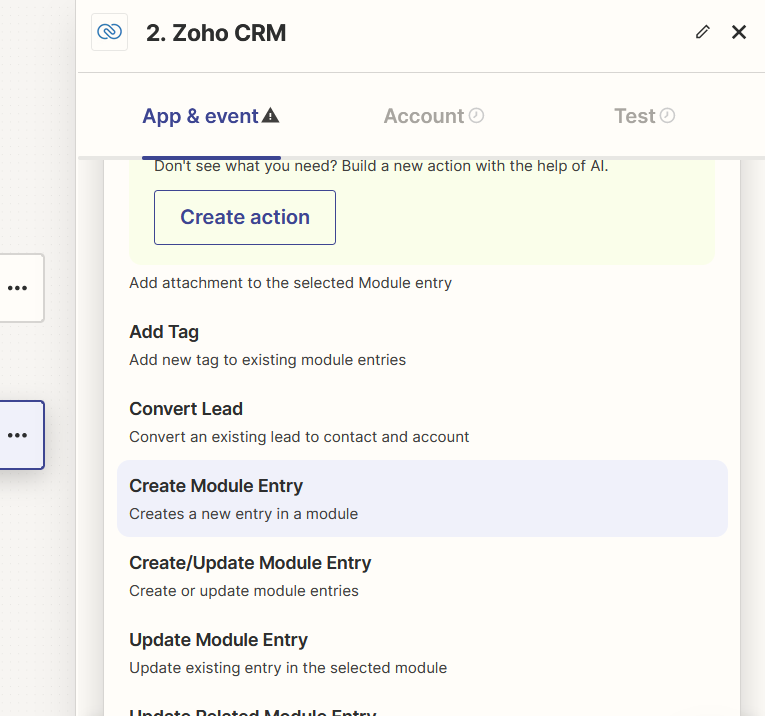
Select your desired EVENT such as Create Module Entry, add tag to customer etc and click on Continue (refer screenshot below)
-
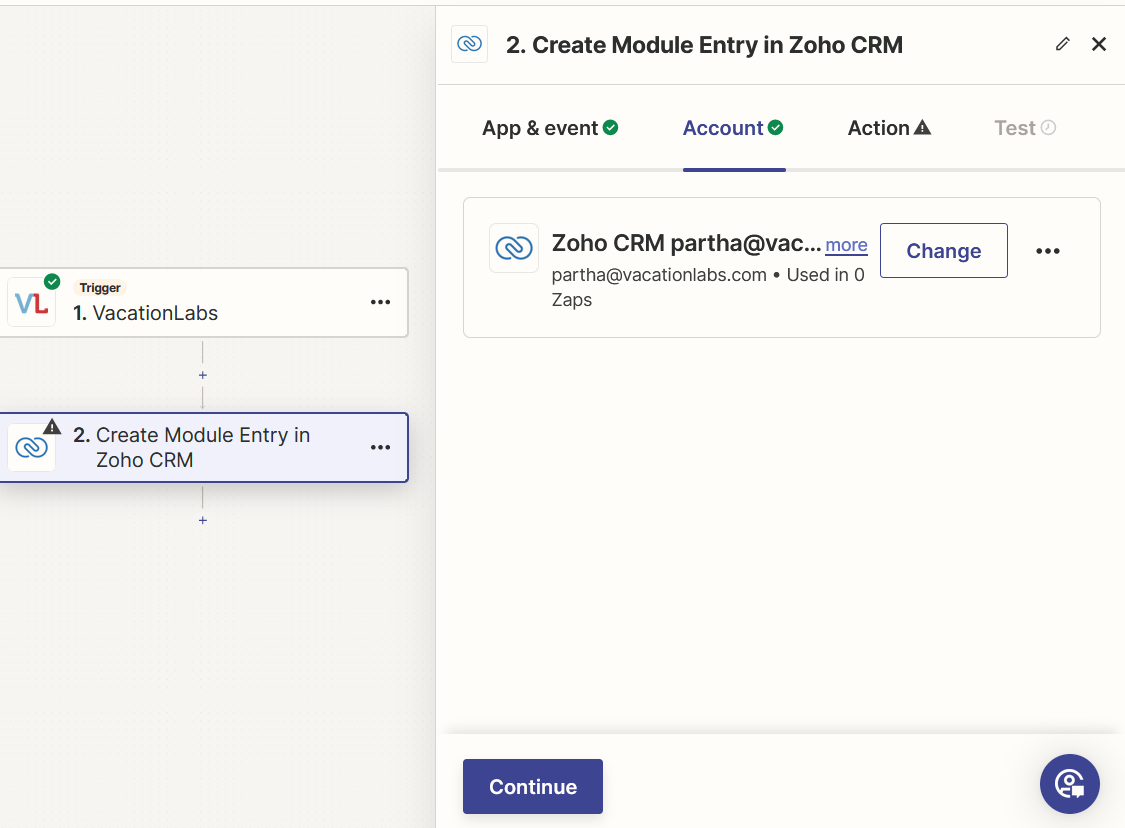
Select your Zoho CRM account and click on continue (refer screenshot below)
-
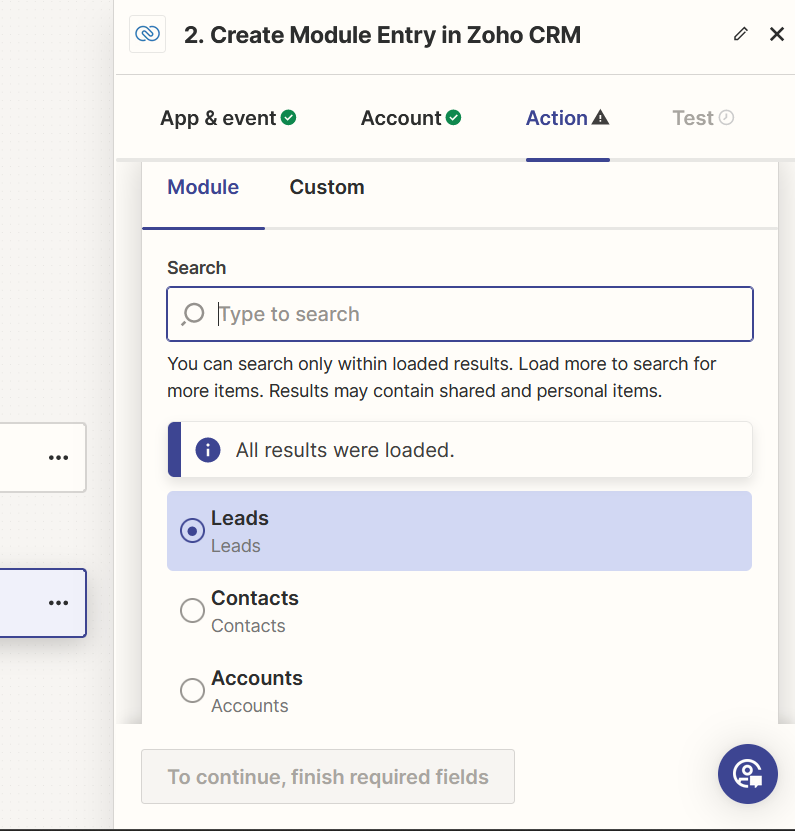
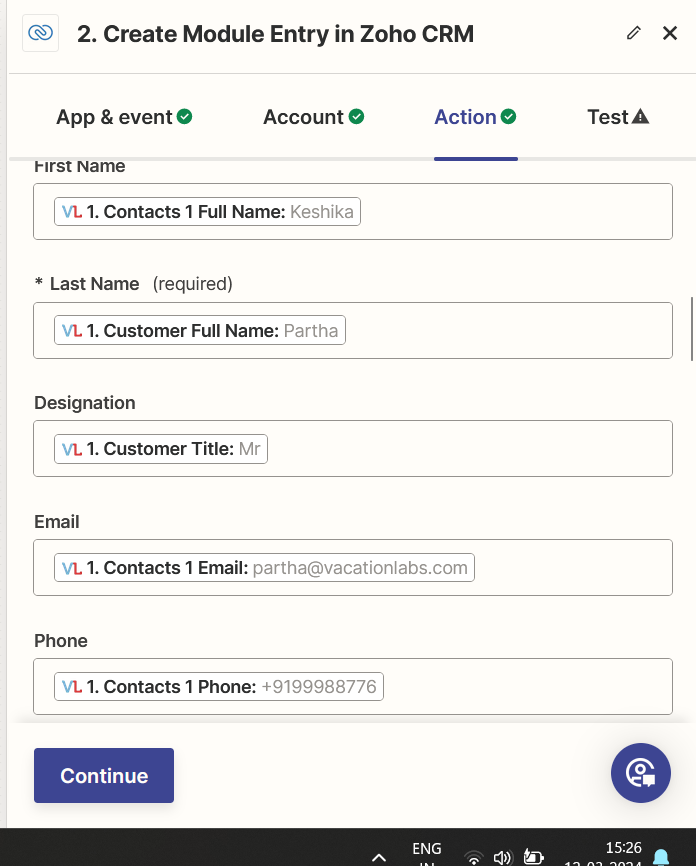
Then you can select on which module you want to create this entry such as contacts, leads, accounts, deals, tasks etc. and add the other data as well (refer screenshot below). In this example, we will be creating entry in the Leads module.
-
Below this you will be able to select which data you want to be mapped/pushed to which field in the CRM (refer screenshot below), then click on **Continue **
-
-
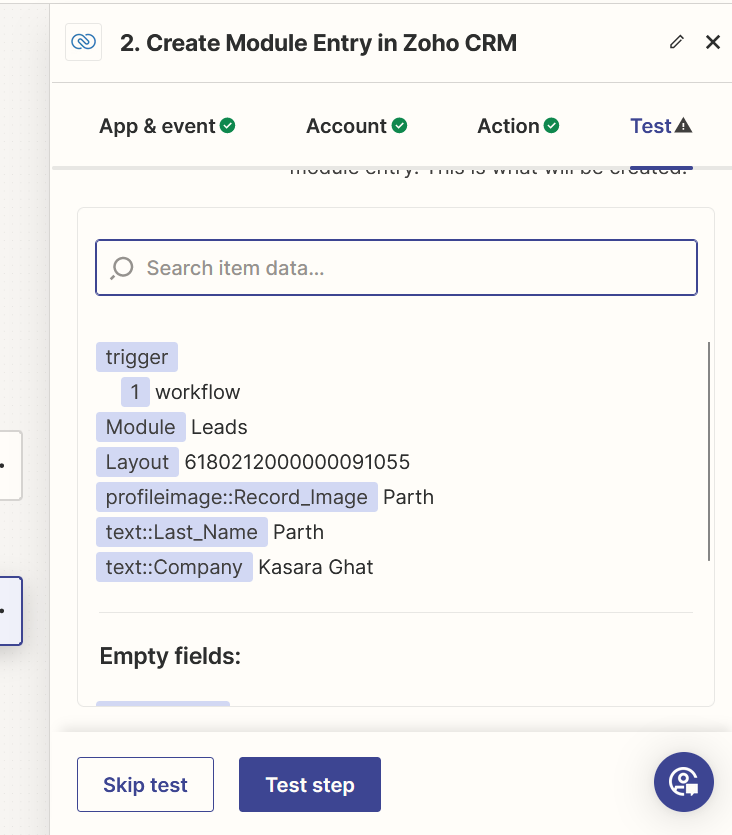
Then you can click on Test Step and Zapier will test this step for you (refer screenshot below)
-
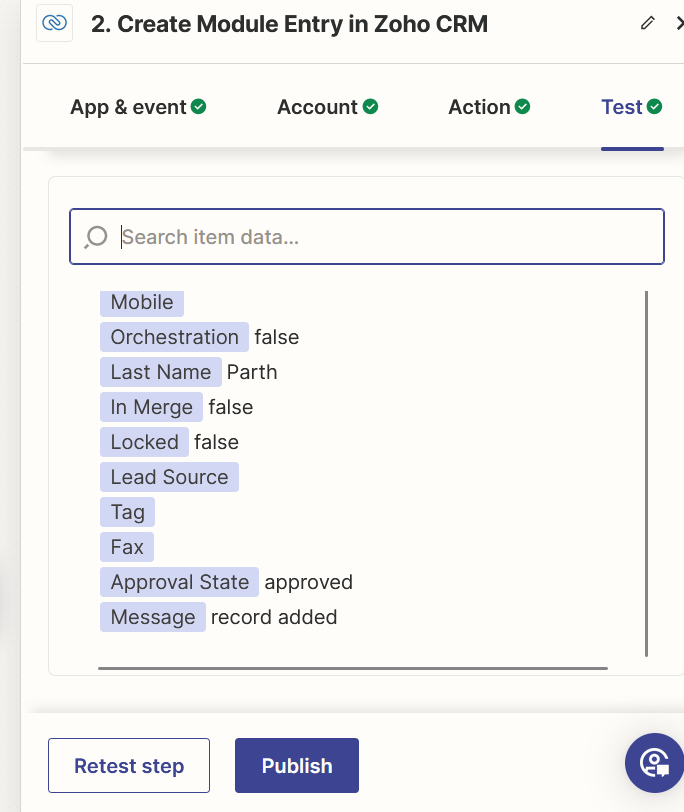
After the test succeeds you can click on PUBLISH to make this workflow live (refer screenshot below)
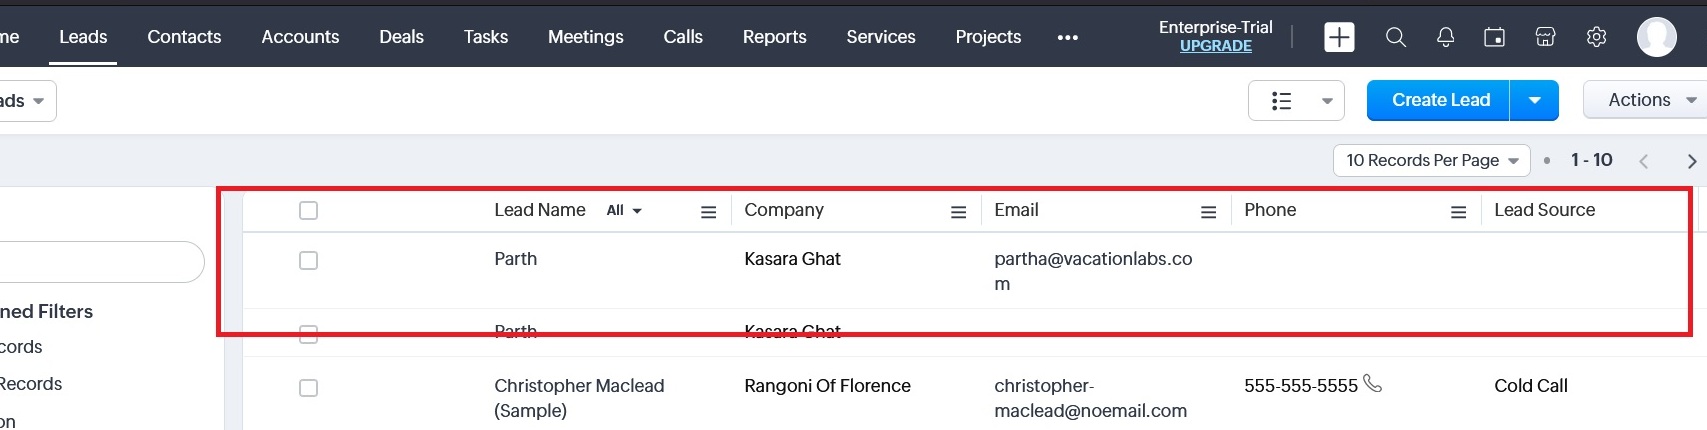
Checking if entry got pushed to the CRM
- Open your Zoho CRM and go the leads (as that is the module we selected for this illustration)
- Check if the entry has been pushed successfully (refer screenshot below)