Understanding Booking Comments vs. Internal Notes
This article explains the difference between two types of notes you can add to a booking: Booking Comments (for customers) and Internal Notes (for your team).
-
Booking Comments: Notes that can be included in customer-facing email confirmations. Use these for information you have agreed upon with the customer and want to formalize in writing (e.g., special requests, agreed-upon details, personalized instructions).
-
Internal Notes: Private notes visible only to your staff. Use these for internal communication, reminders, or documenting sensitive details that should not be sent to the customer.
How to Add a Booking Comment (Customer-Visible)
Step 1: Navigate to the Booking Details Page
-
Log in to your Vacation Labs admin dashboard.
-
From the main navigation menu, select Bookings to view your booking list.
-
Locate and select the specific booking you need to add a comment to. You will be taken to that booking’s Details page.
Step 2: Create and Save Your Comment
-
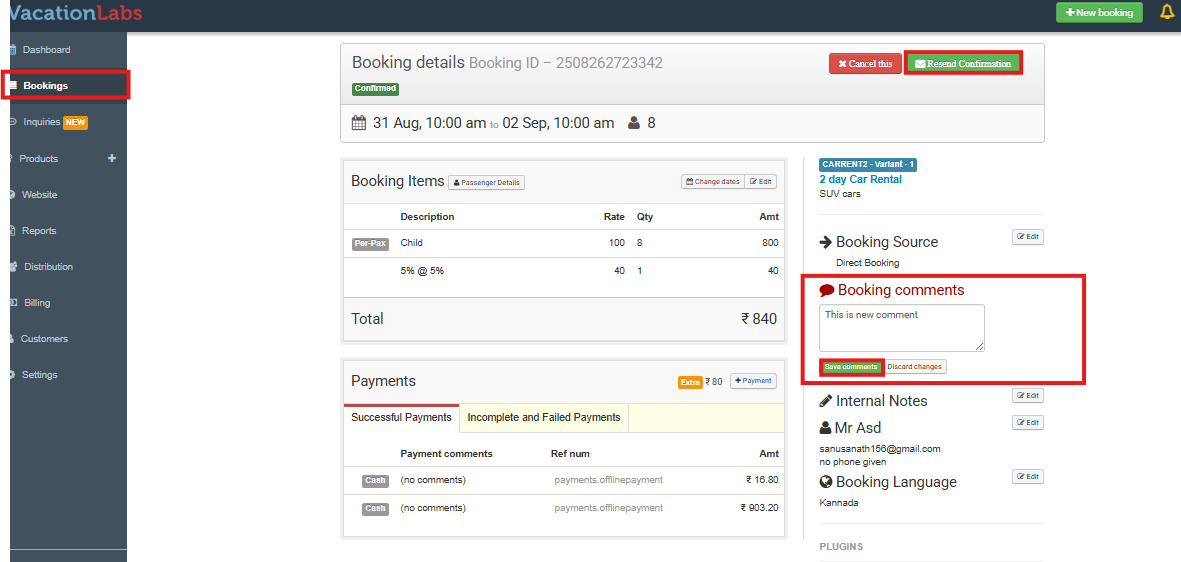
In the Details view, locate Booking Comments and click on the button labeled Edit.
-
A text field will appear. Type your note or comment for the customer in this field.
-
Click the Save Comment button to attach the note to the booking.
Step 3: (Optional) Notify the Customer
-
The comment is now saved internally.
-
To make this comment visible to the customer, you must resend the confirmation email. Click the Resend Confirmation button. The saved comment will be included in the email that is sent to them.
How to Add an Internal Note (Staff-Only)
Step 1: Navigate to the Booking Details Page
- Follow the steps above to log in and select the relevant booking to open its Booking Details page.
Step 2: Create and Save Your Internal Note
-
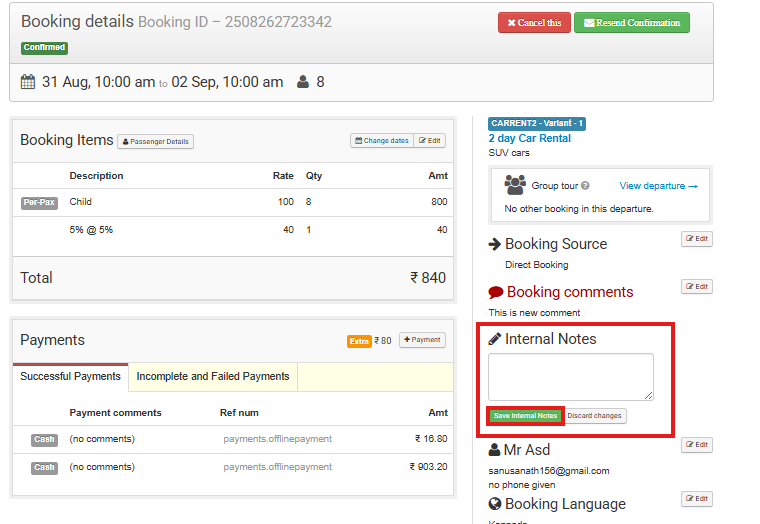
On the Booking Details page, locate the Internal Notes section. This is a separate area from Booking Comments.
-
Click on Edit to open the text field for Internal Notes.
-
Type your private note for internal team use.
-
Click the Save InternalNote button. This note is now stored on the booking and will never be visible or sent to the customer.
Summary
<table class="noBorderWithRowOddColor" cellspacing="0" cellpadding="0">``<tbody>``<tr>``<td>``<div class=" align-center">``<b>Feature</b>``</div>``</td>``<td>``<div class=" align-center">``<b>Booking Comments</b>``</div>``</td>``<td>``<div class=" align-center">``<b>Internal Notes<br>``</b>``</div>``</td>``</tr>``<tr>``<td>``<div class=" align-center">``<b>Visibility</b>``</div>``</td>``<td>``<div class=" align-center">Can be sent to customer via email</div>``</td>``<td>``<div class=" align-center">Never visible to the customer</div>``</td>``</tr>``<tr>``<td>``<div class=" align-center">``<b>Primary Use</b>``</div>``</td>``<td>``<div class=" align-center">Formalizing customer agreements, special instructions</div>``</td>``<td>``<div class=" align-center">Internal team communication, private reminders</div>``</td>``</tr>``<tr>``<td>``<div class=" align-center">``<b>Action Required</b>``</div>``</td>``<td>``<div class=" align-center">Click Resend Confirmation to notify customer</div>``</td>``<td>``<div class=" align-center">No further action needed; note is permanently private</div>``</td>``</tr>``</tbody>``</table>
Best Practices
-
Be Clear and Professional: Since Booking Comments can be sent to customers, write them clearly and professionally as they become part of your official correspondence.
-
Choose the Right Type: Always double-check that you are adding the note to the correct section (Booking Comments for customer visibility, Internal Notes for privacy) to avoid sharing sensitive information accidentally.
-
Resend Confirmation: Remember, a Booking Comment will only appear in a customer’s inbox if you use the Resend Confirmation feature after saving the comment.