
Introducing Advanced Search For Your Website
On your Vacation Labs website, customers can now search for tours and apply predefined filters on these searches. A lot of our clients asked for this feature, especially if their end customers look for tours based on certain criteria. With filters, end customers can have a deeper engagement with your website.
What is An Advanced Search Filter?
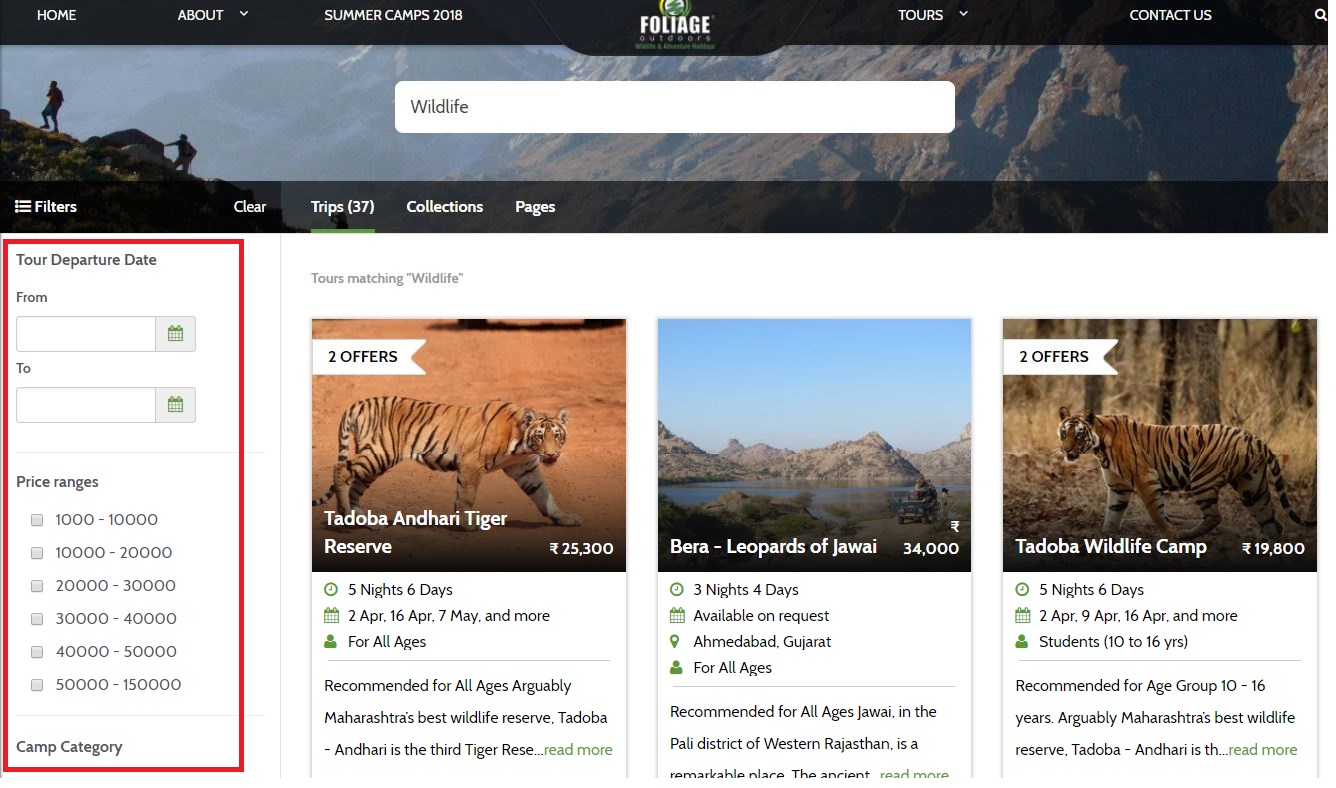
As an example, a customer can type ‘Delhi tours’ into the search bar and receive a list of 25 Delhi tours/packages. On the left, they will now see options/ filters to narrow this search down based on specific pre-set criteria.
Advanced Search has the following filter options-
- Tour departure dates: Customers can pick date ranges when they want to take the tour. All tours which are open on those dates will be displayed.
- Price range: All tours which fall within the price range mentioned by the customer will be filtered out for display. The list is displayed as check-boxes which the customer can pick any number of.
- Tour collection: If the customer wants a specific type of tour from your collections (pre-created collections like food tours, cycle tours, etc.) he can pick one or many categories.
- Location: This filter option allows customers to filter their searches based on locations they want to travel to, to experience your tours.
- Custom: You can add other custom filters too depending on your requirement. Our team will help you set this up- we’re just a call away!
How to create Advanced Search filters?
Step #1
To set up Advanced Search filters for your Vacation Labs website, you need to request our team for the feature. Contact us here.
Step #2
Once enabled, click ‘Settings’ in back-office and open ‘Trip Custom Form’. You can create custom fields here- use ‘Define Custom Field’. Next, add field type (eg. pick option from list) and restrictions. Click ‘Done’.
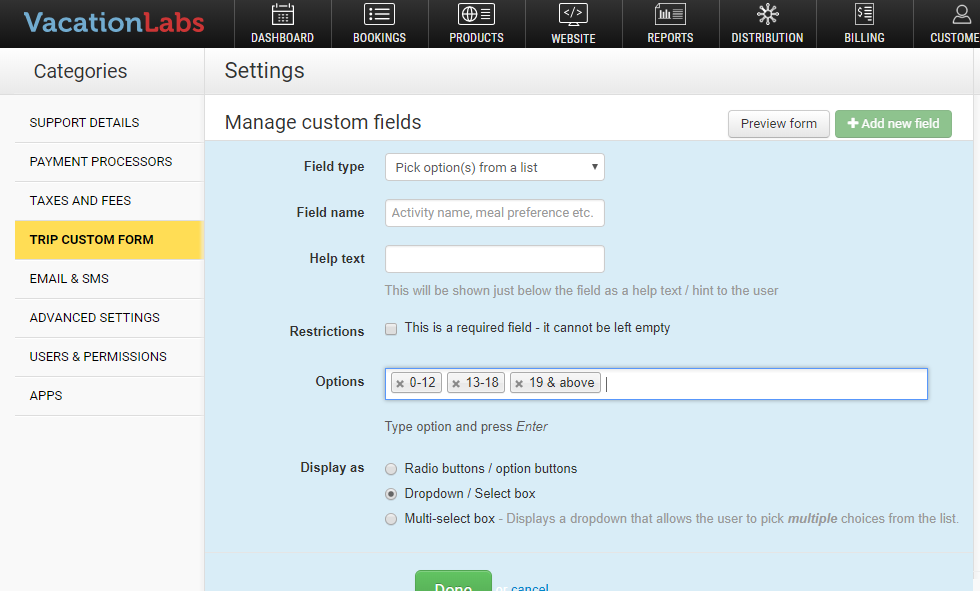
(*Note- for the display options as seen in the screenshot, the drop down and dropdown/ select box do not allow customers to select more than one option. It is useful if your tours do not appear in more than one category.)
Step #3
The search fields need to be assigned to relevant tours. Open the tours in the back-office and go to ‘Basics Details’. Select the relevant options (which appear on these pages) and ‘Save’ (See the image below).

Step #4
Finally, inform our support team once the changes are made. They will enable these for you. Hope this feature is very useful to you!