Adding A record and CNAME in GoDaddy
You need to add DNS to mark sure that the website and online services are accessible and working correctly.
-
To add an A record in GoDaddy, follow these steps:
-
Sign in to your GoDaddy Domain Portfolio.
-
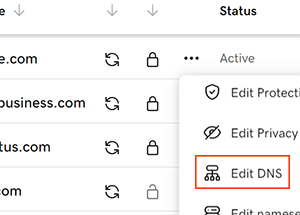
Select
 Domain Edit Options next to your domain and then select Edit DNS. You may need to scroll down to see the Edit DNS option.
-
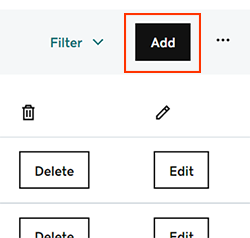
Select Add to add a new record.
-
Select A from the Type menu options.
-
Enter the details for your new A record:
-
Host/Host Name: @
-
Value/Destination/Points to: 13.232.79.15
-
TTL: leave it as whatever is default configured. If there is no value configured then use : 38400 (seconds)
-
Select Add Record to save your new A record.
-
To add a CNAME record in GoDaddy, follow these steps:
-
Sign in to your GoDaddy Domain Portfolio.
-
Select
Domain Edit Options next to your domain and then select Edit DNS. You may need to scroll down to see the Edit DNS option.
-
Select Add to add a new record.
-
Select CNAME from the Type menu options.
-
Enter the details for your new CNAME record:
Host/Host Name: www
Value/Destination/Points to: sf.vacationlabs.com
TTL: leave it as whatever is default configured. If there is no value configured then use : 38400 (seconds)
6. Select Add Record to save your new CNAME record.
Note: It can take some time for the changes to propagate to DNS servers globally, so it may take a few hours for the CNAME record to become active. Also, make sure that the domain name or hostname you are pointing the CNAME to exists and is configured correctly.