Creating a Booking Form with Extra booking fields
By default, every booking form collects your customer’s basic contact details such as Name, Email, and Phone Number. If you need additional details (like Age, Address, Dietary Preferences, or any other custom input), you can attach an Extra Booking Form to any trip/product.
Step 1: Create a New Booking Form
-
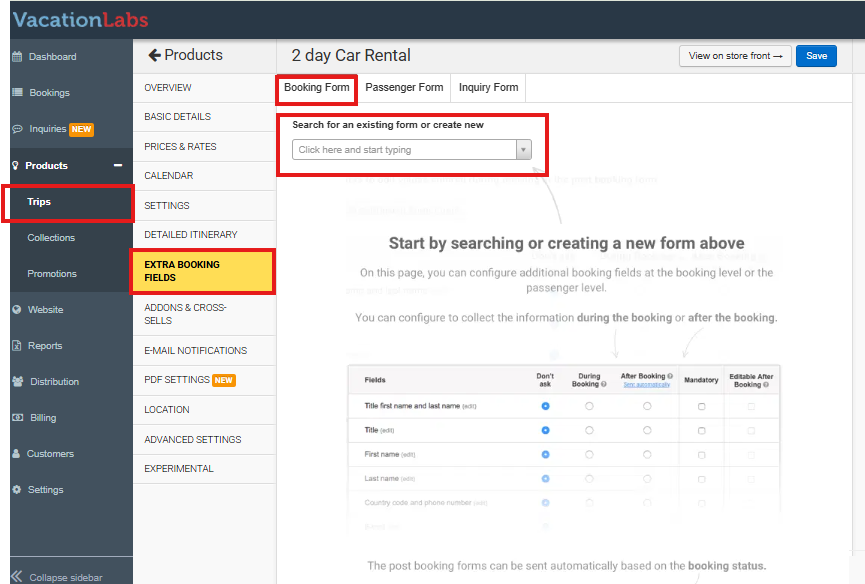
Edit the trips where you want to add extra fields.
-
Go to the section Extra Booking Fields.
-
Under the Booking Form tab, click on the field labeled Click here and start typing.
-
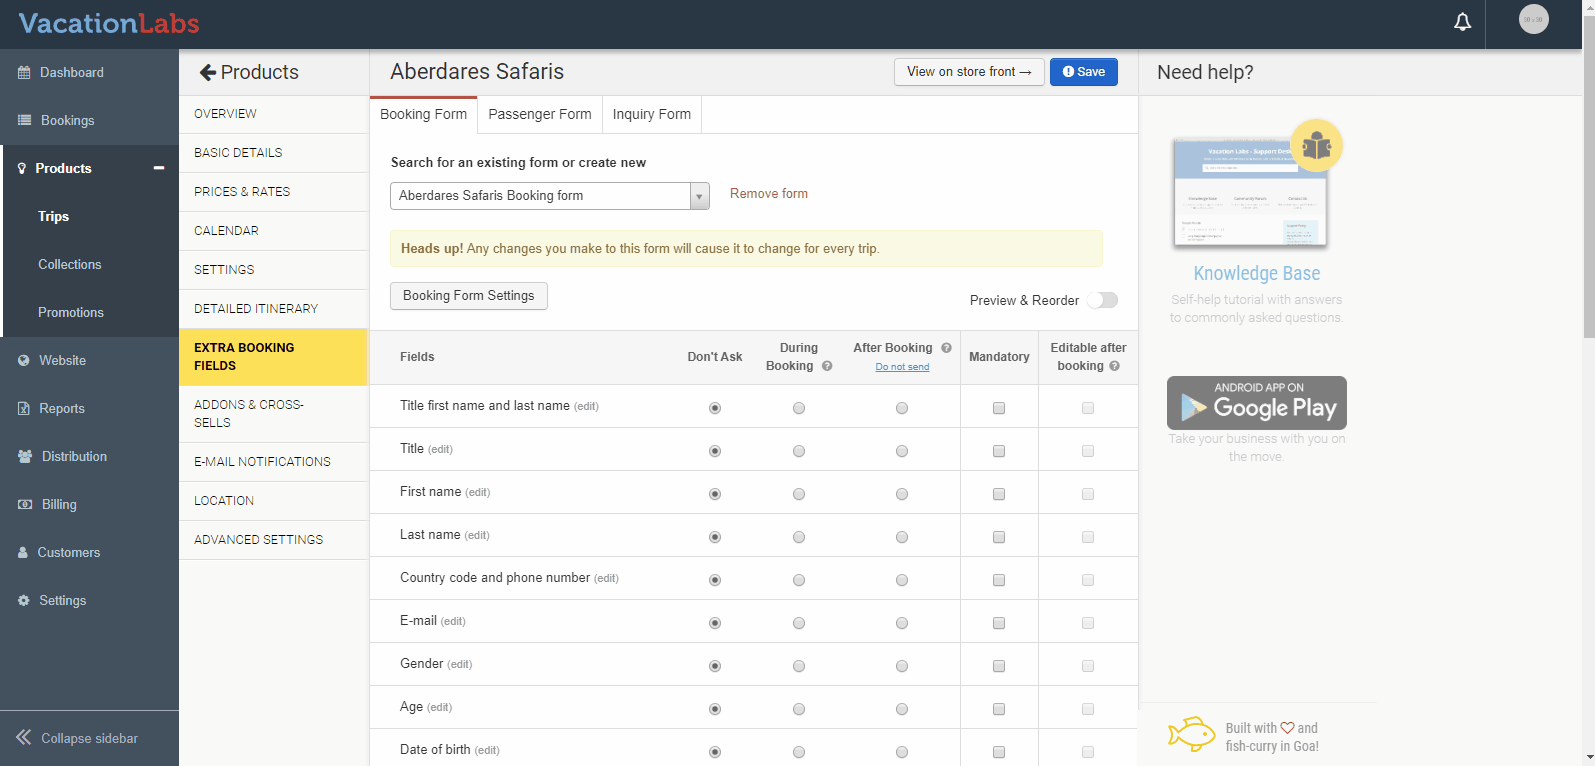
Enter a name for your new form (e.g., “Cycling Tour Form” or “Trekking Extra Details”).
Tip
Once you enter the name, a new form is created and will display a list of default fields
Step 2: Default Booking Fields
When a new form is created, it includes the following default fields. You can enable, disable, or make fields mandatory as needed.
-
Title (First Name and Last Name)
-
Title
-
First Name
-
Last Name
-
Country Code and Phone Number
-
Email
-
Gender
-
Age
-
Date of Birth
-
Street Address
-
City
-
State
-
Postal Code
-
Newsletter Signup
Note
**Notes: **
-
Fields under During Booking appear to customers during booking.
-
Fields marked Mandatory must be filled out.
-
Fields marked Editable after booking can be updated later.
-
Fields marked After Booking will trigger an email to the customer who booked the trip.
Step 3: Save the Form
-
To save your form, choose any field from the default list.
-
Click the radio button under the During Booking column for that field.
-
Click Save.
-
After saving, you can add or remove fields, enable/disable them, or edit the form further.
Step 4: Add Custom Fields
If default fields are not enough, you can create custom fields.
-
Click Add Custom Field at the bottom-right corner of the screen.
-
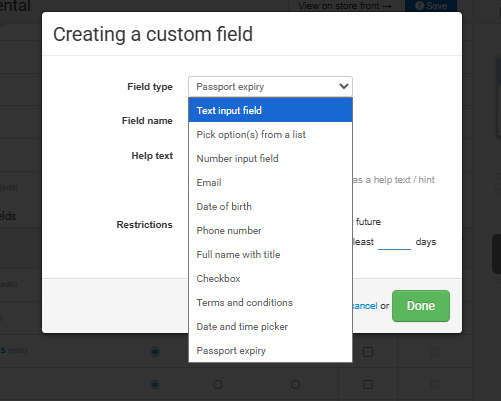
Choose the field type based on your needs. The available options include:
-
Text input field → For free-text input.
-
Pick option(s) from a list → To provide predefined choices for the customer (e.g., Meal Preference: Vegetarian / Vegan / Non-Veg).
-
Number input field → For numeric data such as age or quantity.
-
Email → To collect additional email addresses.
-
Date of birth → To collect the customer’s birthdate.
-
Phone number → To collect additional phone numbers.
-
Full name with title → For collecting complete names including title.
-
Checkbox → For yes/no or multiple-choice selections.
-
Terms and conditions → For agreement acceptance. When selected, you can:
-
Add explanatory text in the Text Content section
-
Customize the agreement text in the Checkbox Text field (e.g., “I agree to the terms & conditions”)
-
-
Date and time picker → For scheduling or deadlines. When selected, additional display options will appear:
-
Date and time picker (default)
-
**Date only picker **
-
Time only picker
-
Passport expiry → For travel-related passport information.
-
Set Restrictions including:
-
Allowing dates up to 30 years in the future
-
Ensuring the passport remains valid for a minimum number of days
-
-
Enter the field name and Help Text (if needed).
-
Click Done.
Info
The new field will appear at the bottom of the field list.
Step 5: Enable Custom Fields
-
To activate a field, click the radio button under the During Booking column.
-
Click Save again to confirm
Step 6: Test the Booking Form
-
Open the Tour page in your website where the form was added.
-
Make a test booking.
-
Verify that all activated fields (default + custom) appear correctly in the booking process.
You now have a reusable Extra Booking Form that can be attached to any tour or product.