How to add a new section on a page?
Sections are the fundamental building blocks of your pages. Use them to add pre-designed content blocks like feature lists, testimonial cards, or product collections to customize your page’s layout and content.
Steps to Add a New Section
-
Navigate to the Pages Manager
-
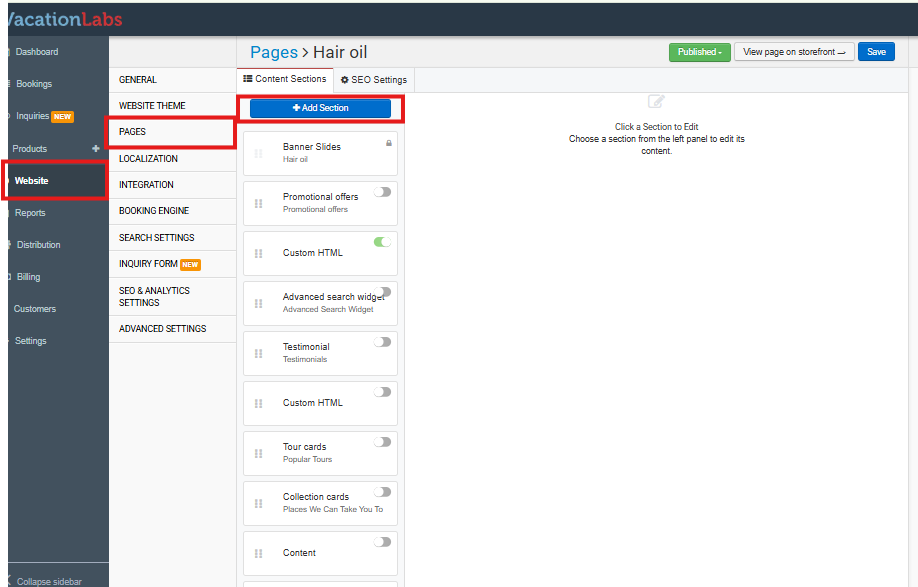
From your Vacation Labs Dashboard, locate the main navigation menu.
-
Select the option labeled Website.
-
Then, click on Pages from the sub-menu. This will open a screen listing all pages on your site.
-
-
Select the Page to Edit
- From the list of pages, click on the title of the page you wish to modify. For instance, to edit your main landing page, click on Homepage.
-
Open the Section Menu and Choose a Type
-
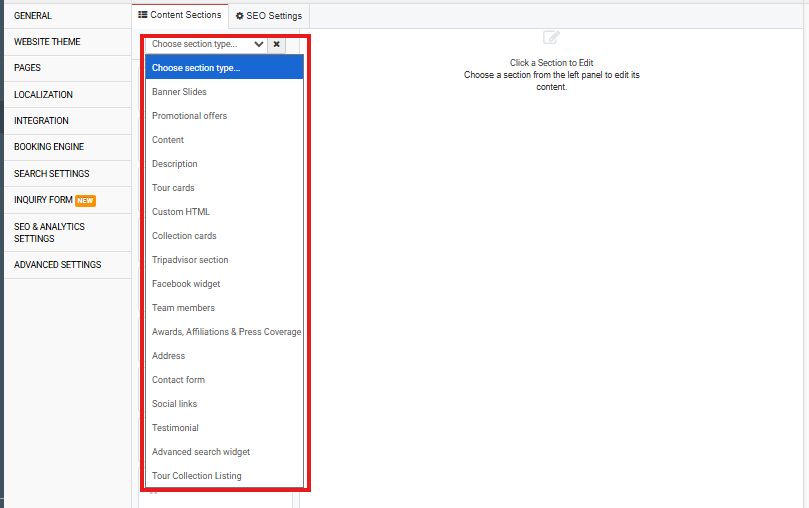
On the page editor screen, locate and click the button labeled Add Section.
-
This action will open a dropdown menu displaying a categorized list of all available section types.
-
-
Select and Add Your Section
-
From the dropdown menu, click on the type of section you want to add (e.g., Tour Cards, Collection List, Image Banner, Contact Form).
-
The system will automatically add your chosen section to the top of the page. Please note that for preview purposes, new sections are added in a disabled state and will not be visible on your live site yet.
-
-
Enable and Customize the New Section
-
Find the new section on your page. You will see a toggle switch associated with it.
-
Move the toggle to the On (typically green) position to enable the section.
-
Once enabled, click anywhere on the section block to open its editing panel. Here you can modify its content, adjust settings, and customize its appearance.
-
Key Things to Remember
-
Reordering: You can change the sequence of sections by dragging and dropping them into your desired order.
-
Unique Options: Each section type has a dedicated set of customization options accessible after you click on it.
-
Publishing: Always click Save in the page editor’s header to apply all your changes and make the new section live on your website.