How to create Route Maps for itineraries via Google My Maps
Before you start
Info
Create a custom HTML section for the tour page. The field name can be designated as ‘Route Map,’ or you can opt for your preferred name for the custom field. Please click here for detailed steps on creating a custom HTML section.
Configuring a Route Map
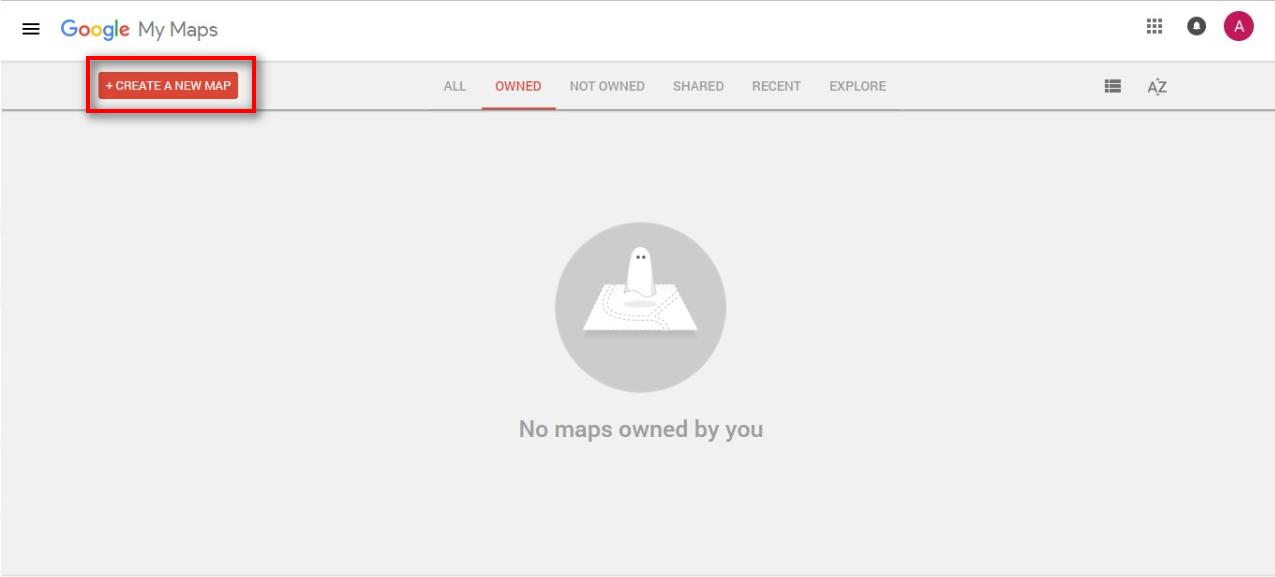
- Log in to Google My Maps at below link using your Gmail id.
https://www.google.co.in/maps/d/u/0/
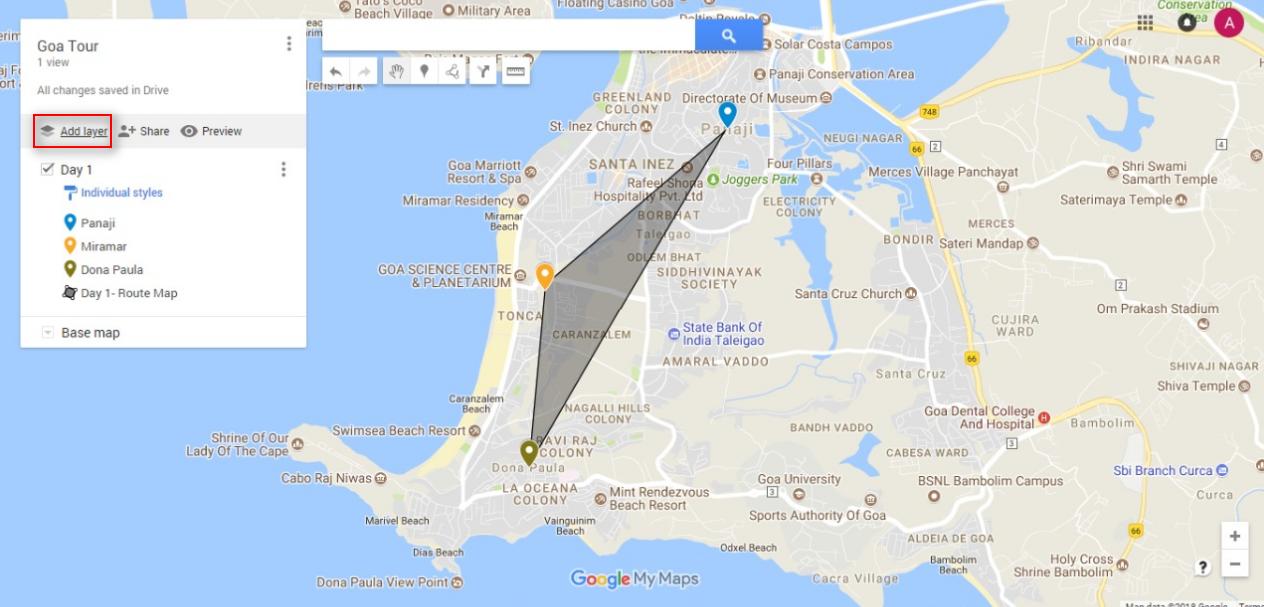
- Click “Create A New Map” button
- Name the map as per the trip name by editing the name “ Untitled map”. Just click on the name to edit it.
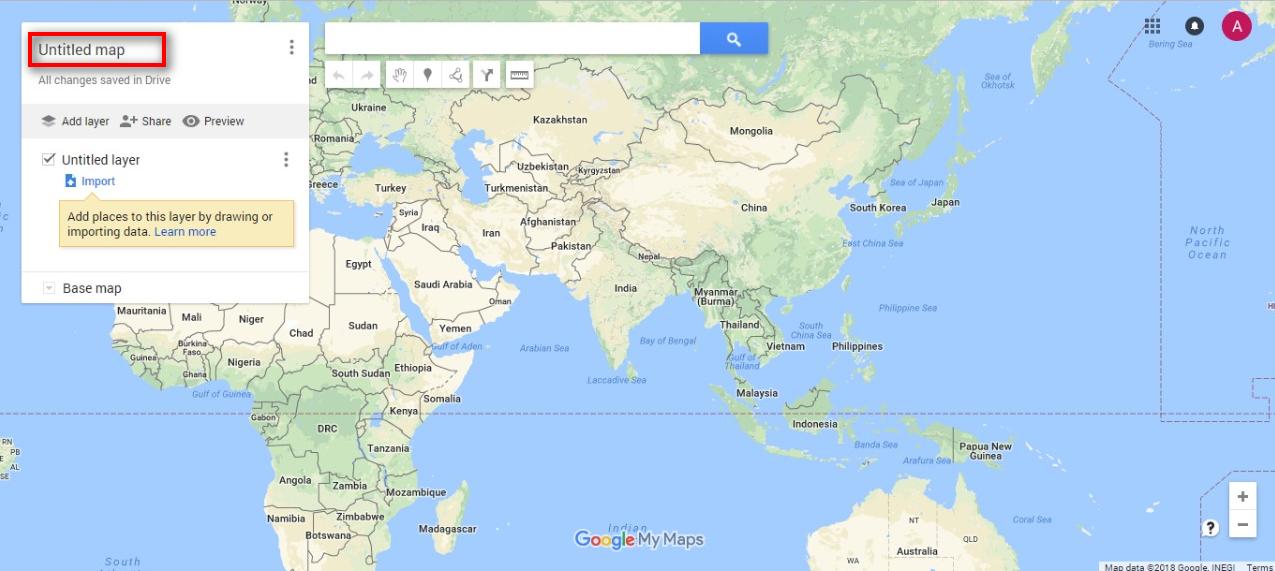 Rename the “Untitled layer” to Day 1 or as required.
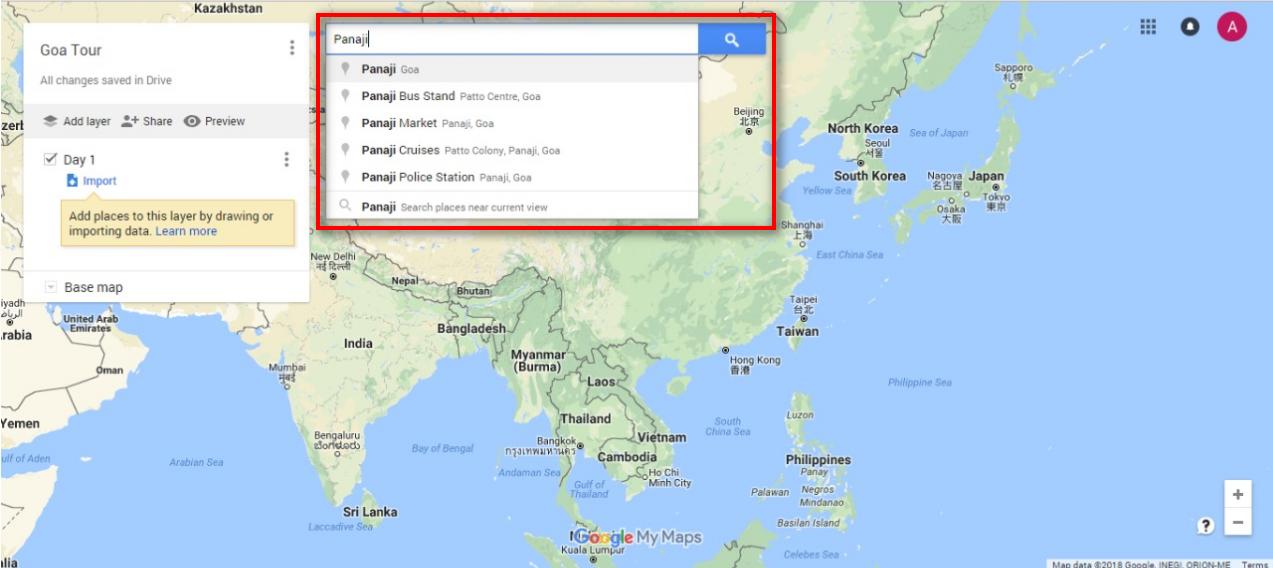
- Search for a location as required using the search bar, and click on the suggested locations. (You may adjust the location by moving the drop pin as desired.)
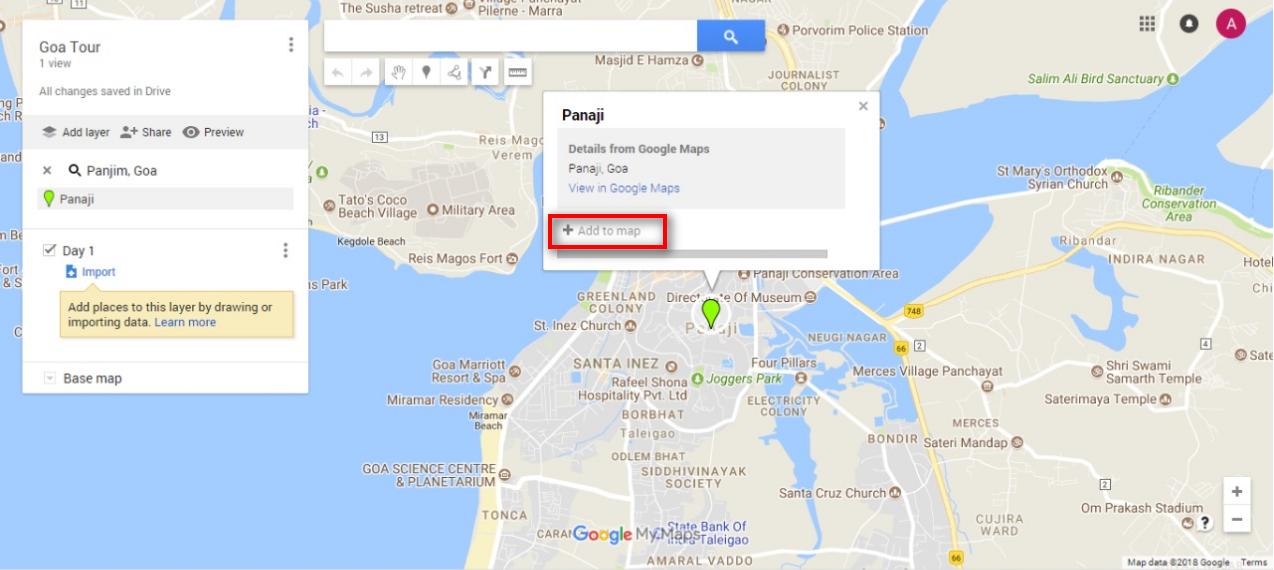
- Once the location is finalized click on add to map on the popup window for that location. It will get added under the Day 1 layer.
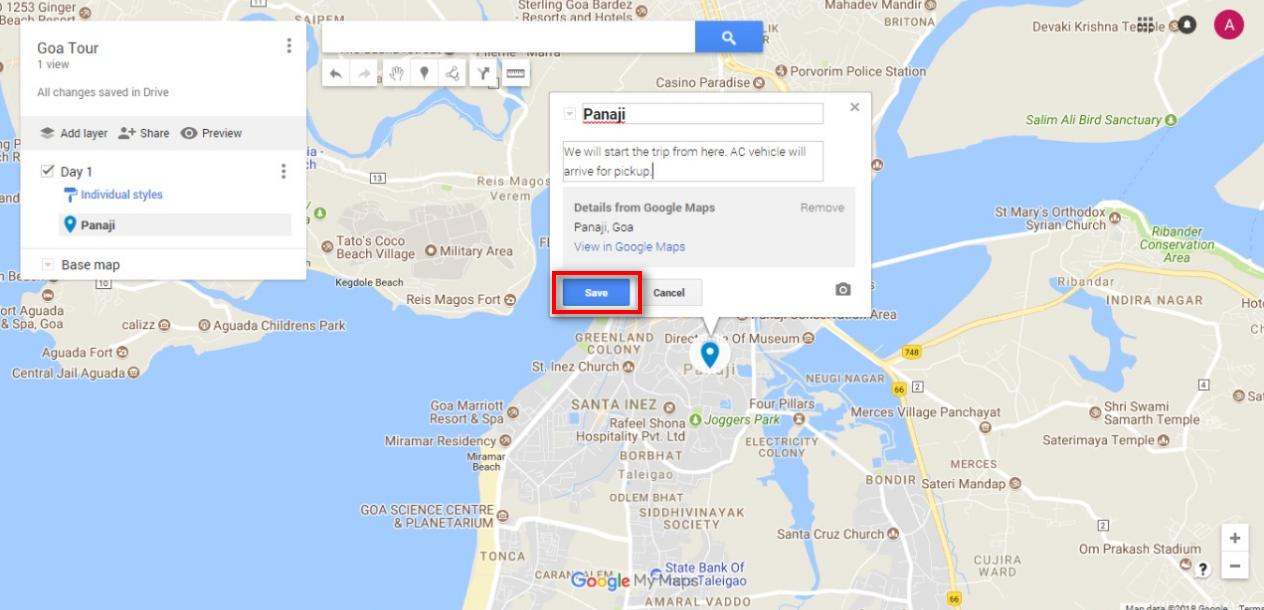
- a)Once added to map you can click edit button to change the name and description of the location.
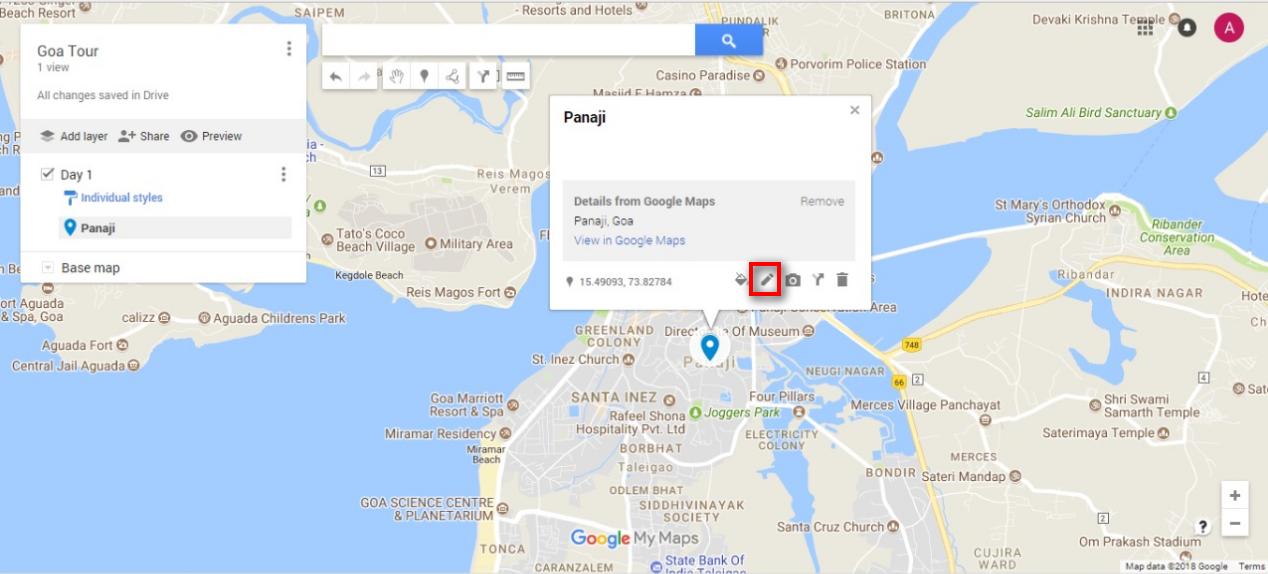
b) Click save once done.
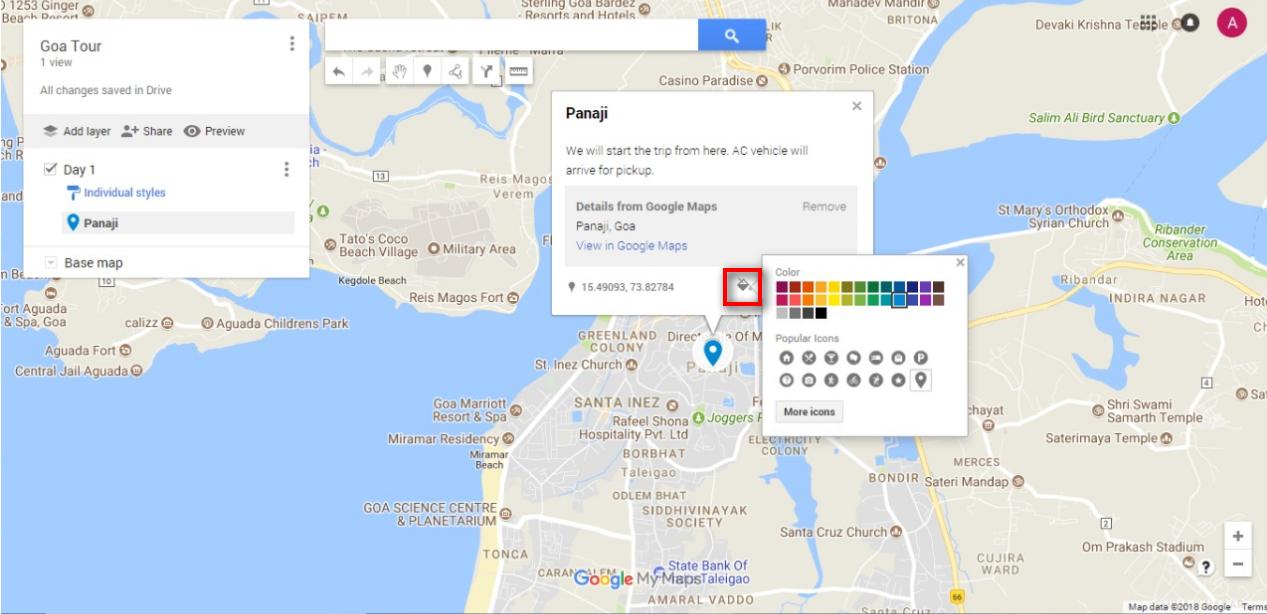
- You can also edit the style of the location by clicking on the style button (paint bucket icon)
Tip
You can set icons for the location like a hotel, restaurant etc along with the color of your choice.
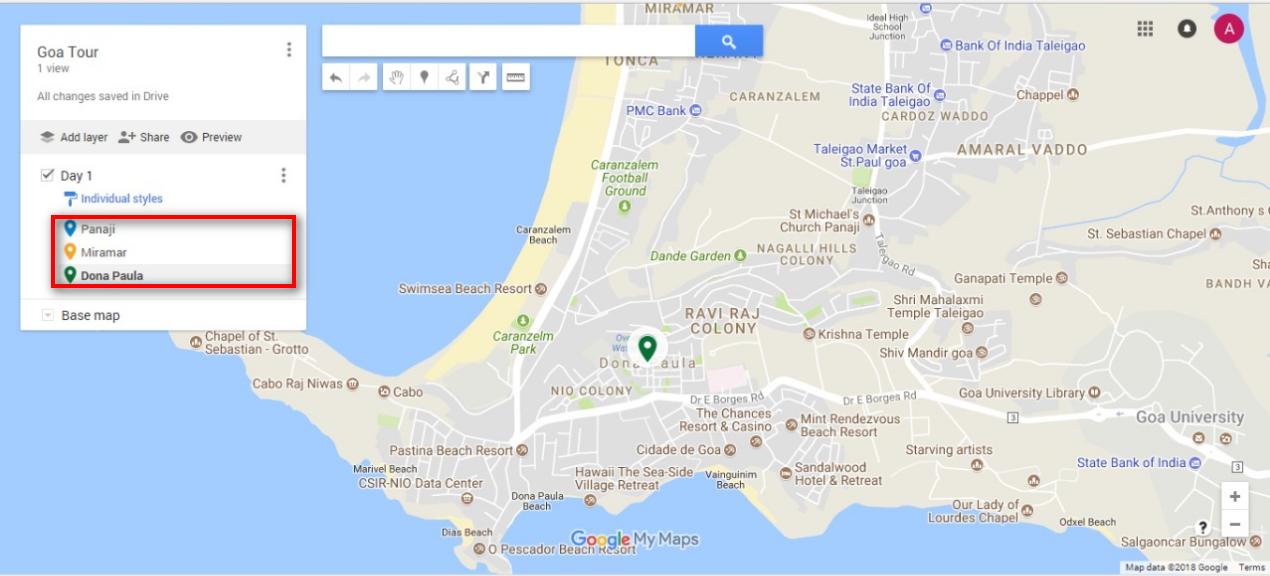
- Once done repeat the process for the rest of the location to be added in day 1 as described above.
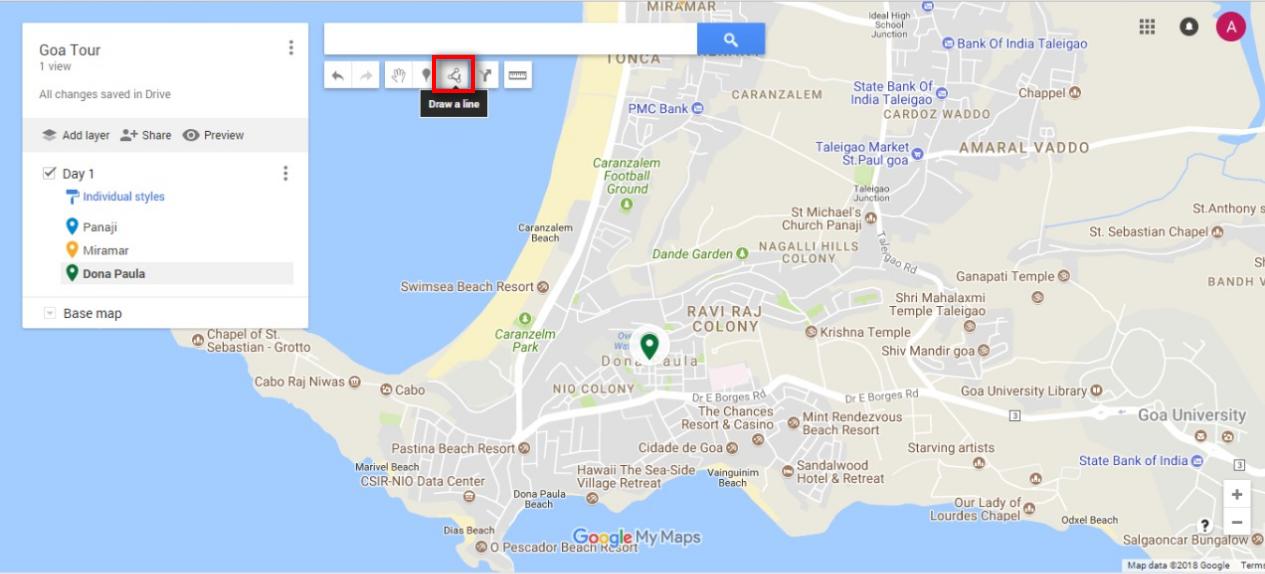
- Once all the locations are added you may add lines to join the places.
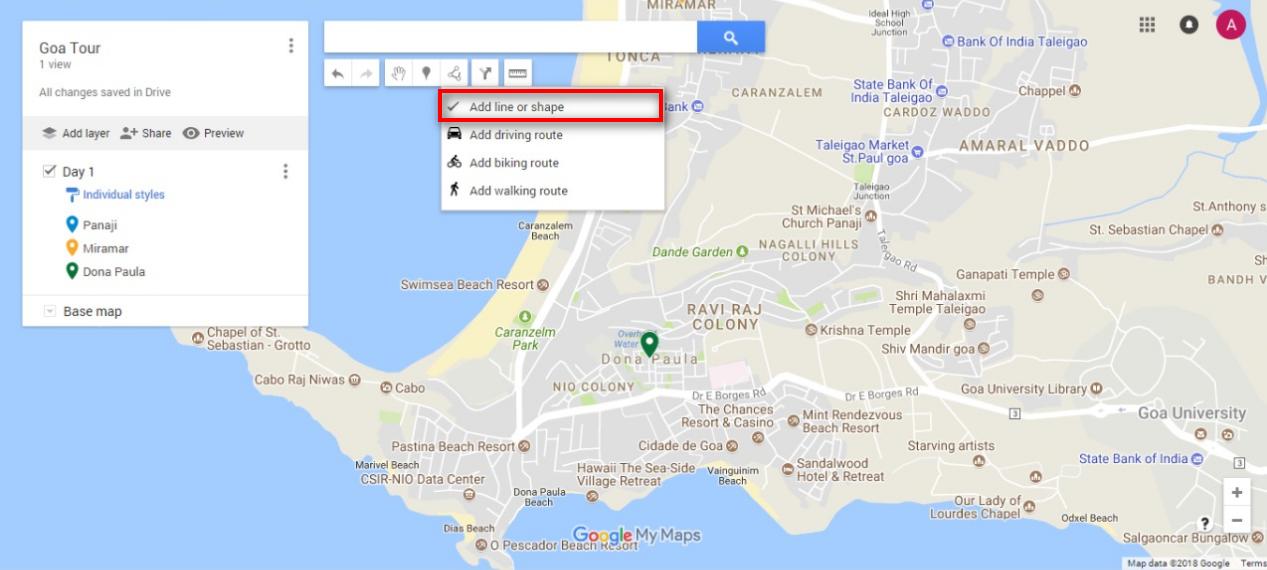
a) Click on Draw a line button.
Tip
Here you can also choose other options like Driving, biking or walking route.
We will use a line or shape to connect the locations together.
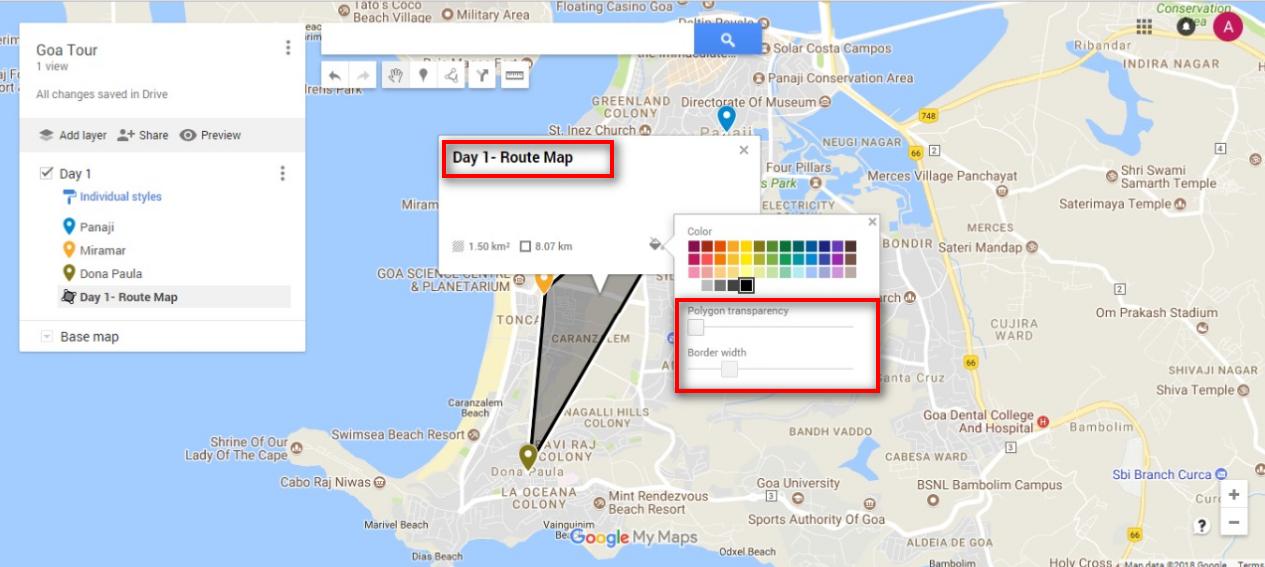
b) Using the line connects the locations approximately in the order of visits planned and double click to end the shape that you will reach. Once done rename the line section to Day-1 Route and add a description.
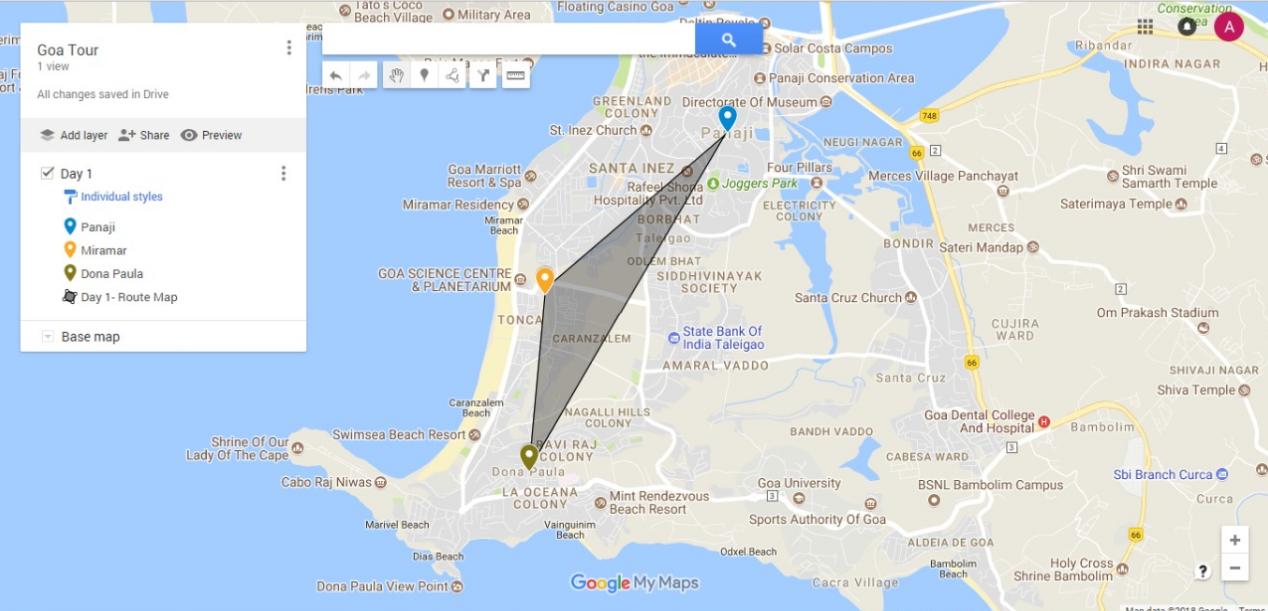
c) Change the line thickness (width) or the color of the line as preferred.
- Click on Add layer button to add new layer and rename it to Day-2 or as preferred and repeat the above process to add locations and connecting lines with new colors (the choice is yours).
Info
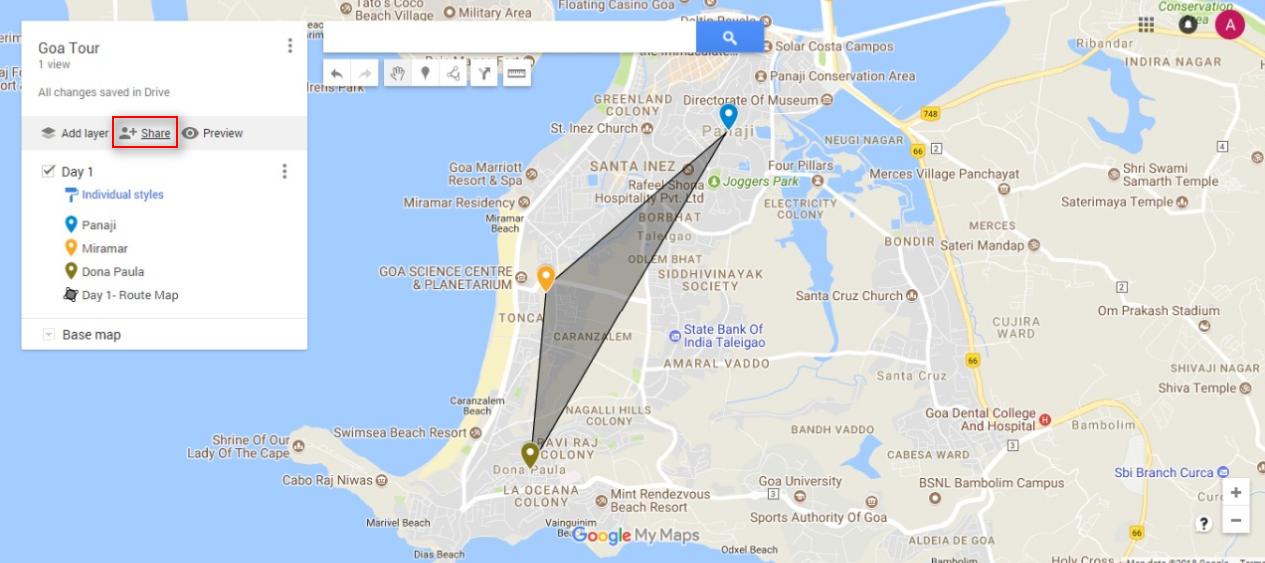
Once route-map is ready as per your requirement, you will have to make it public so that anyone can access it without logging in.
- Please follow the below steps to make the map public.
a) Click on the Share button below the name of your map.
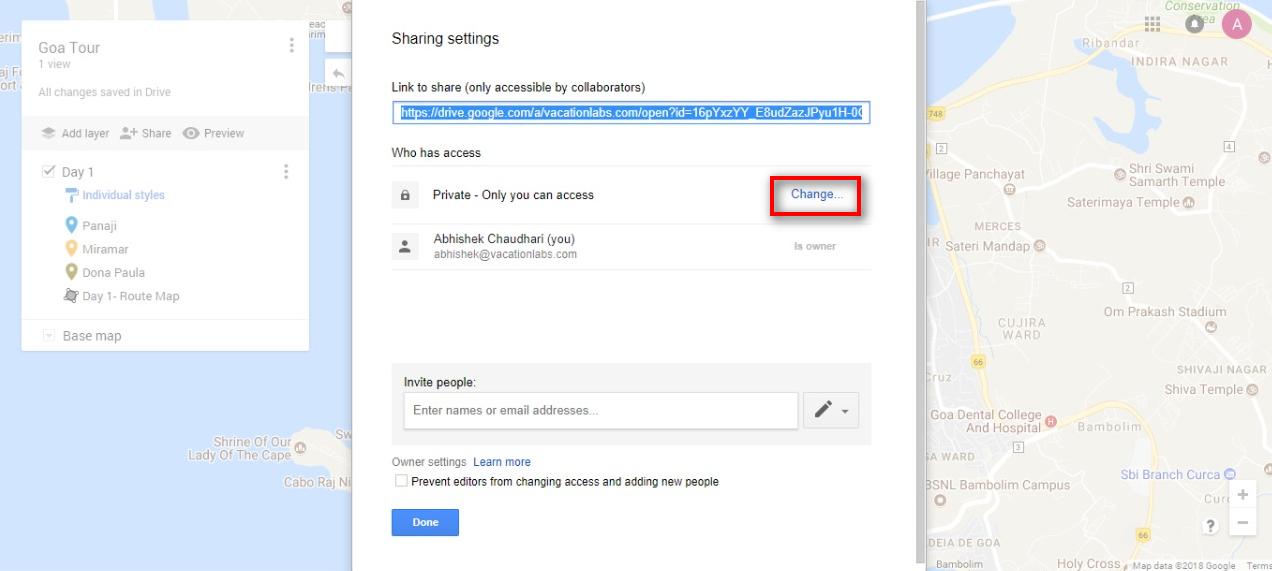
b) Click on Change in the Sharing Settings window that will popup.
c) Select “On – Public on the web”. Do not change its default setting of “Can view”. Let it be as is. Click Save.
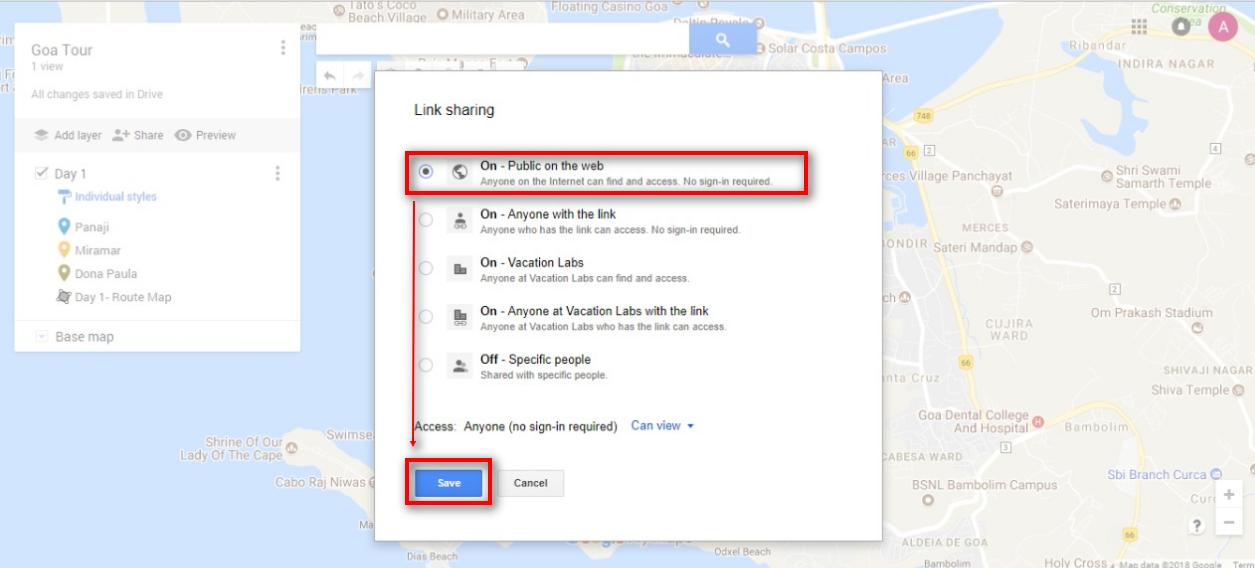
d) Click Done on the Sharing Settings window, to successfully make your route map public.
Info
Once this is done, we need to get the URL of this map to add to our trip page.
- Please follow the below steps to get the URL of the Map.
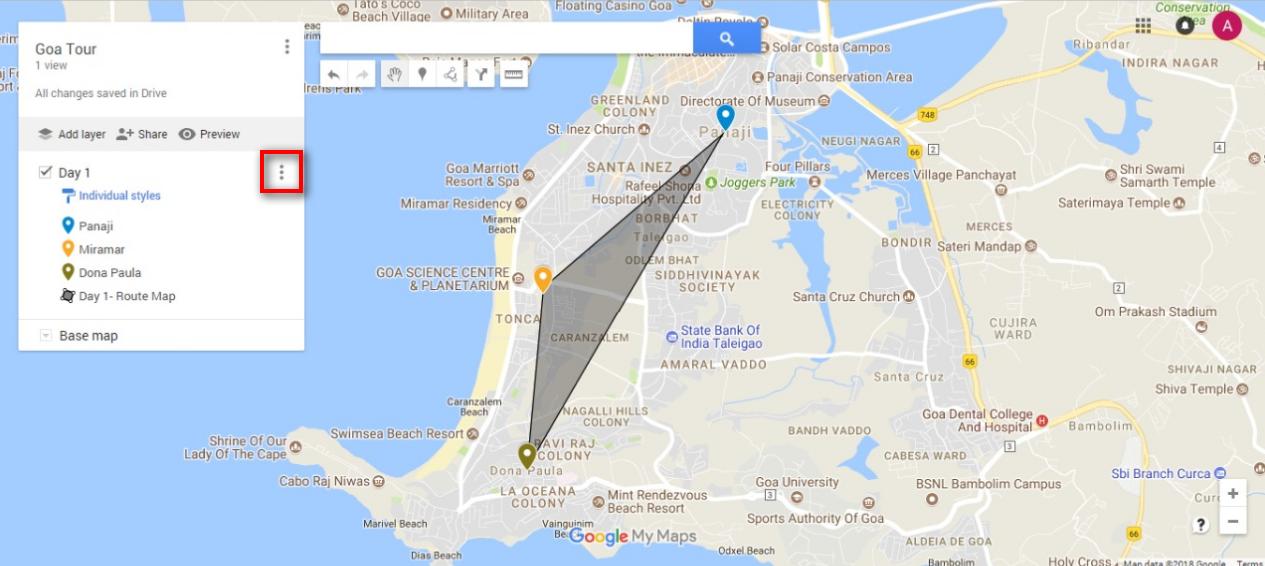
a) Click on the 3 vertical dots next to the name of your map, which will open a scroll down the window.
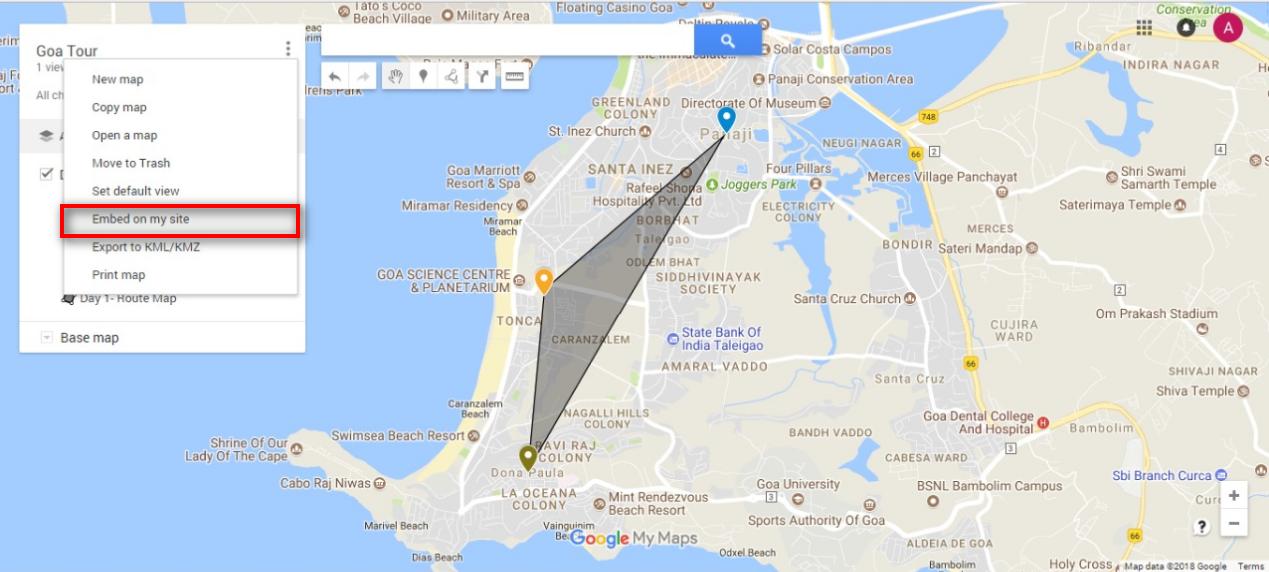
b) From the scroll down window select “ Embed on my site”
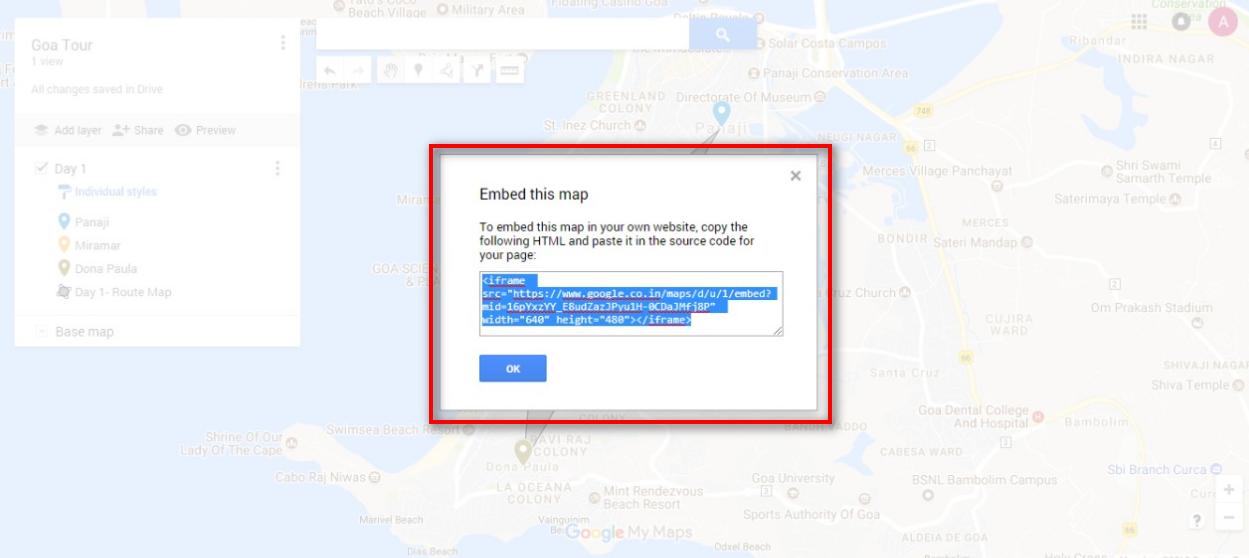
c) From the pop window of “Embed this map” copy only the URL part of the map (starting with HTTP, within double quotes after src= ).
Tip
The URL will look like this https://www.google.com/maps/d/embed?mid=1dYWP_n11E6n6yhUR7zTTv-6M7sLbCZCE
Info
Once you copy this URL, you need to add it to your trip.
Add a Route Map in Vacation Labs Back Office
Info
Create a custom HTML section for the tour page. The field name can be designated as ‘Route Map,’ or you can opt for your preferred name for the custom field. Please click here for detailed steps on creating a custom HTML section.
Log in to the VL Back Office and navigate to Products > Trips. Edit the trip where you want to add a route map. In the Basic Details section, scroll down to the custom section called “Route Map” (or the name of the field you have added), paste the URL of the map in the field, and save the changes.

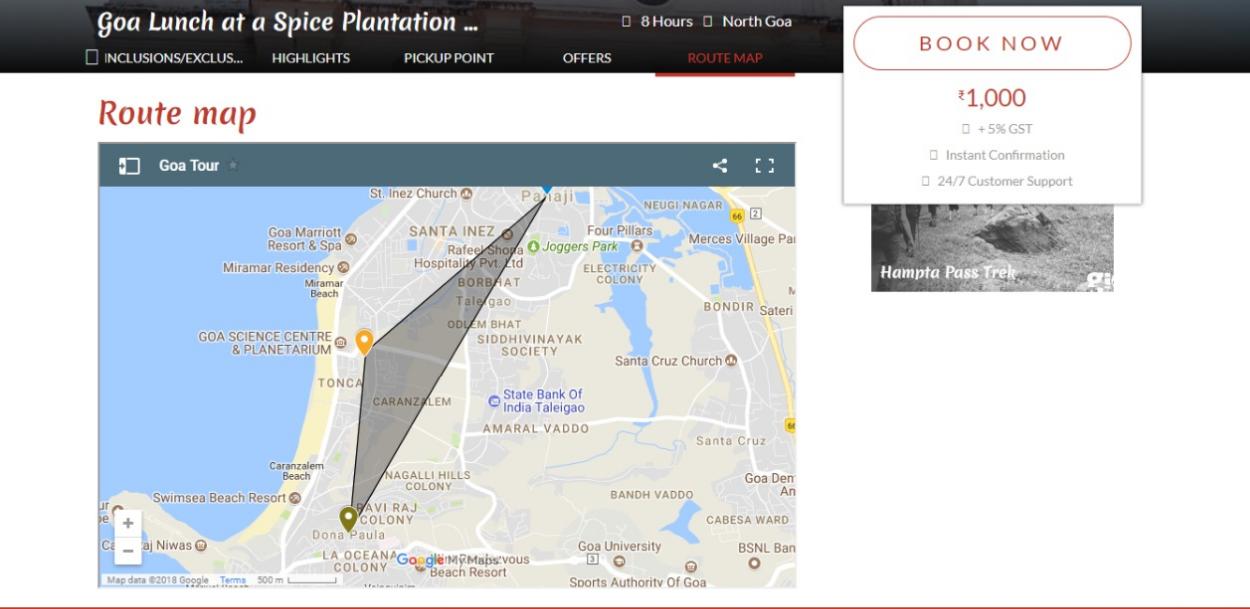
Check Route Map on Trip Details Page
Now your Route map will be visible on the trip page.
Info
Note:
- The above steps are just the tip of the iceberg, feel free to experiment with all the settings that Google offers.
- Also, Google keeps on updating the options available, thus it is possible that few of the option names mentioned maybe renamed or altogether removed or moved to another section.